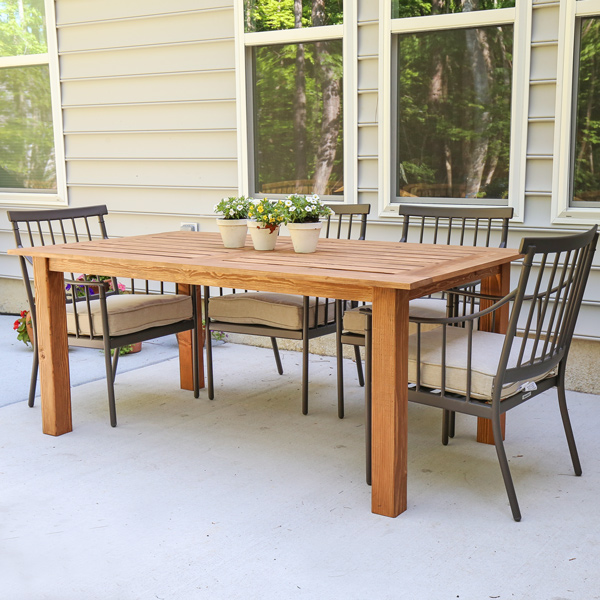
Learn how to build a DIY outdoor dining table that’s budget friendly and beautiful!
Building a DIY outdoor table has been on my to do list for quite some time! And has been highly requested by others too!
You are watching: DIY Outdoor Table
After building our other DIY outdoor furniture, including a DIY outdoor couch, outdoor chair, outdoor coffee table, and outdoor side table, a DIY patio table was the perfect next piece to build to compliment the set!

The Cost to Build this DIY Outdoor Dining Table
Note, this post contains some affiliate links. For more info see my disclosures here.
Although the cost of lumber has been higher lately, this DIY outdoor table is still very budget friendly! Currently this table costs less than $150 in lumber which is cheap compared to similar style outdoor wood tables that retail from $450 – $1200+ currently!
I didn’t use framing lumber on the top frame of the table like I did on our DIY outdoor coffee table and DIY outdoor side table. 2×6 framing lumber is actually more expensive right now than 1×6 common wood.
Printable DIY Outdoor Table Plans
To make the build process even easier, make sure to get the printable DIY outdoor table plans which include the cut list and step by step building steps with easy to follow diagrams!
Chairs Used with Table
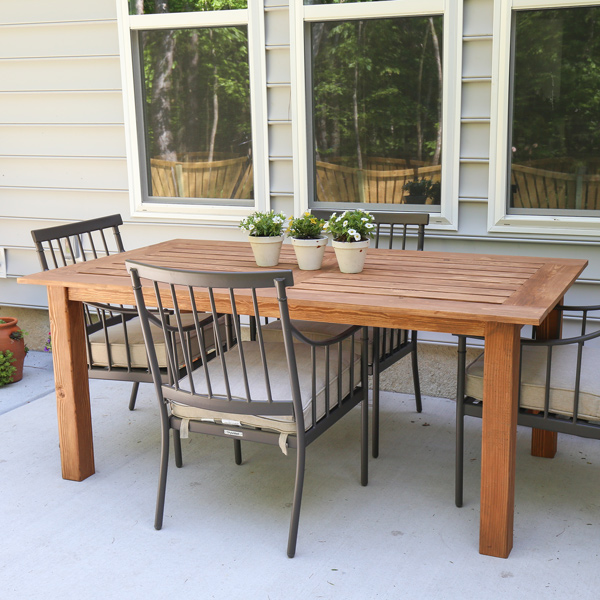
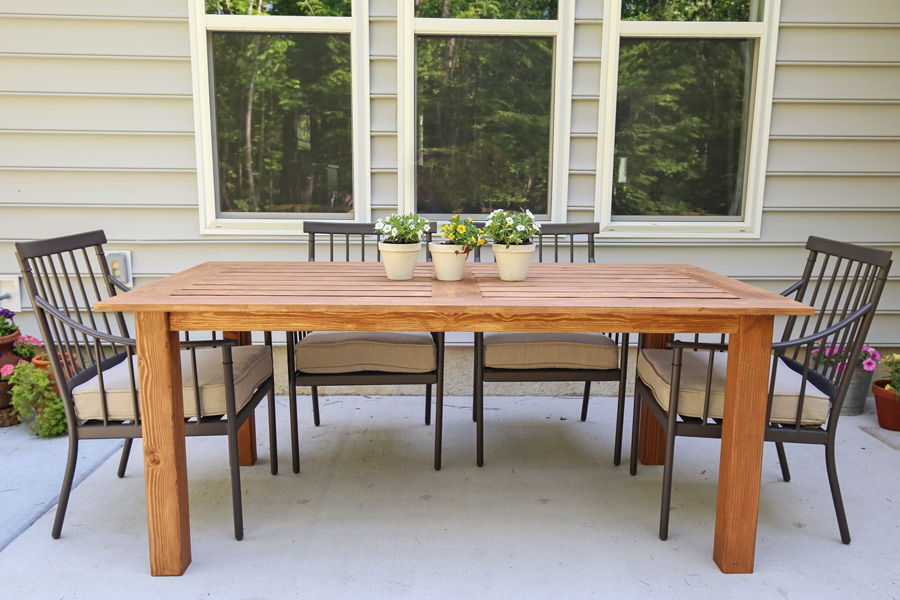
This table is 72″ long and will comfortably fit 6 outdoor dining chairs (even larger size chairs).
I paired our DIY patio table with two sets of these metal outdoor dining chairs with cushions. They were the highest quality chair for the best price (that came with cushions) that I could find that I liked the style of best. I do plan on adding two more chairs to our set in the future.
But, I have rounded up several other budget friendly outdoor dining table chairs options that would look great with this table!
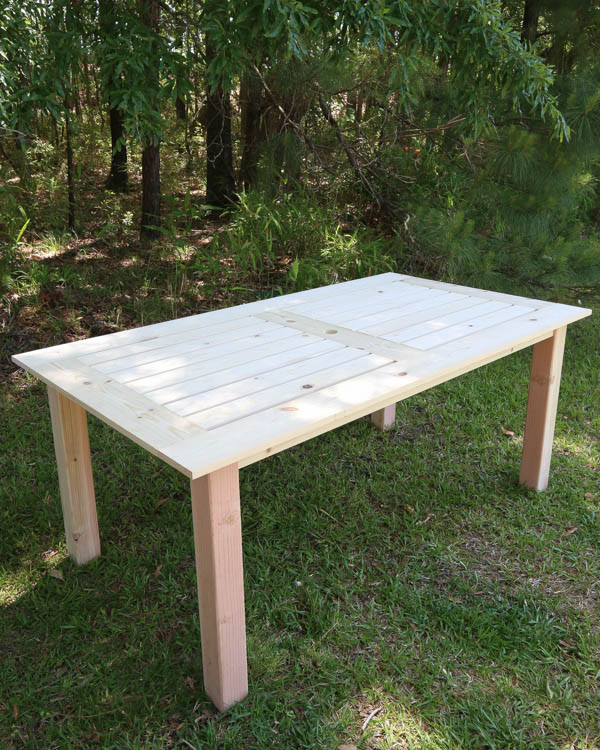
DIY Patio Table Dimensions
The final dimensions of this outdoor dining table are 30″ tall x 72″ long x 39 1/2″ wide.
How to Build a DIY Outdoor Table:
*Make sure to use UNTREATED wood for all of the lumber, including the 4x4s. Do not use pressure treated wood.*
DIY Outdoor Table Video:
Subscribe to my YouTube Channel here!
Watch the DIY outdoor table how to video here!
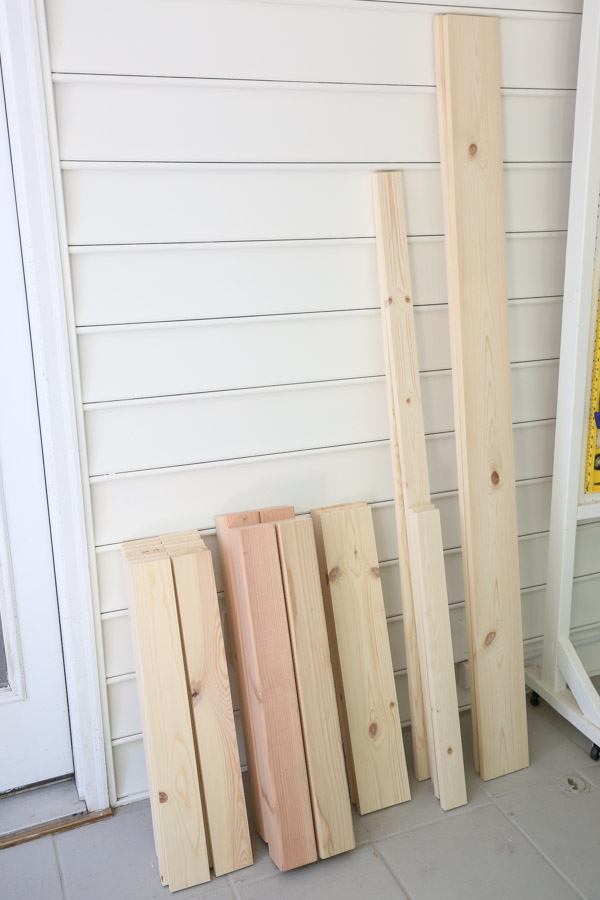
1. Make the initial lumber cuts
Click here for the printable outdoor dining table plans PDF which include the cut list and step by step building steps with easy to follow diagrams!
Use a miter saw and make the following cuts from the 1x6s:
- (2) 1×6 @ 72″ (for table top side frames)
- (3) 1×6 @ 28 1/2″ (for table top middle & side frames)
- (14) 1×4 @ 27 3/4″ (for table top slat boards)
- (4) 4×4 @ 29 1/4″ (for table legs)
- (2) 1×3 @ 59″ (for table aprons)
- (2) 1×3 @ 28 1/2″ (for table aprons)
Tip: Make a stop block jig for easy cutting of the (14) 1×4 @ 27 3/4″ slat boards so they are all the exact same. You can see this jig in action in the outdoor table VIDEO here!
Note, there will be a few more lumber cuts in step #5 for the table support boards.
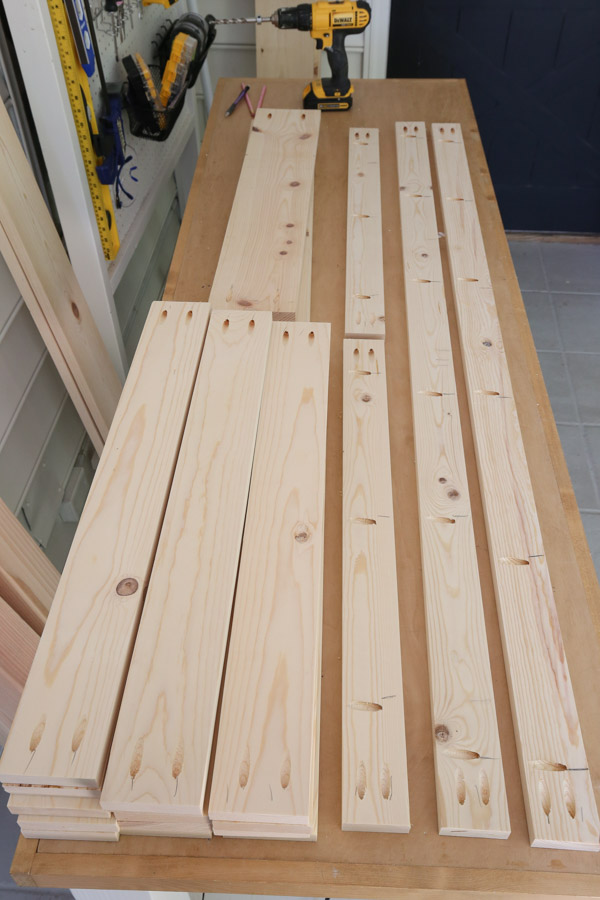
2. Add pocket holes to boards
Read more : The 7 Best Cast Iron Pans in 2023, Tested and Reviewed
Use a Kreg Jig and add pocket holes to both ends of the following boards:
- (3) 1×6 @ 28 1/2″ (for table top middle & side frames)
- (14) 1×4 @ 27 3/4″ (for table top slat boards)
For the DIY outdoor dining table aprons, add pocket holes to both ends AND along one side:
- (2) 1×3 @ 59″ (for table aprons)
- (2) 1×3 @ 28 1/2″ (for table aprons)
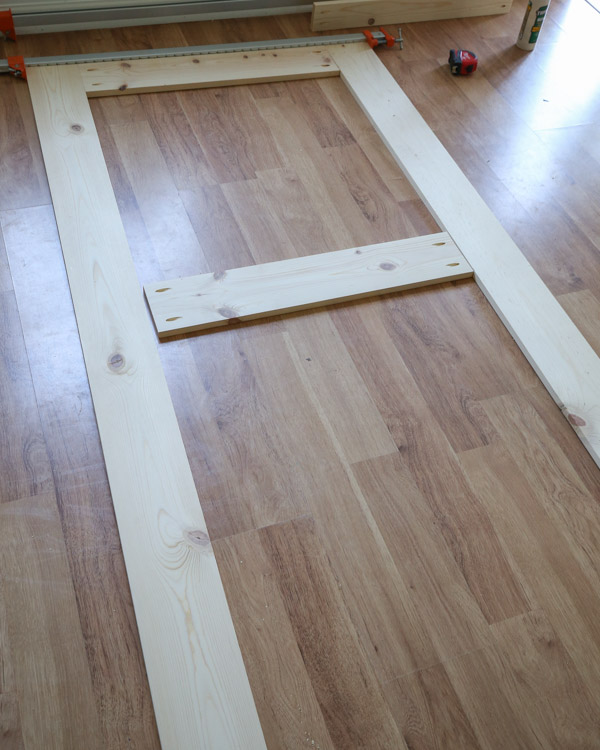
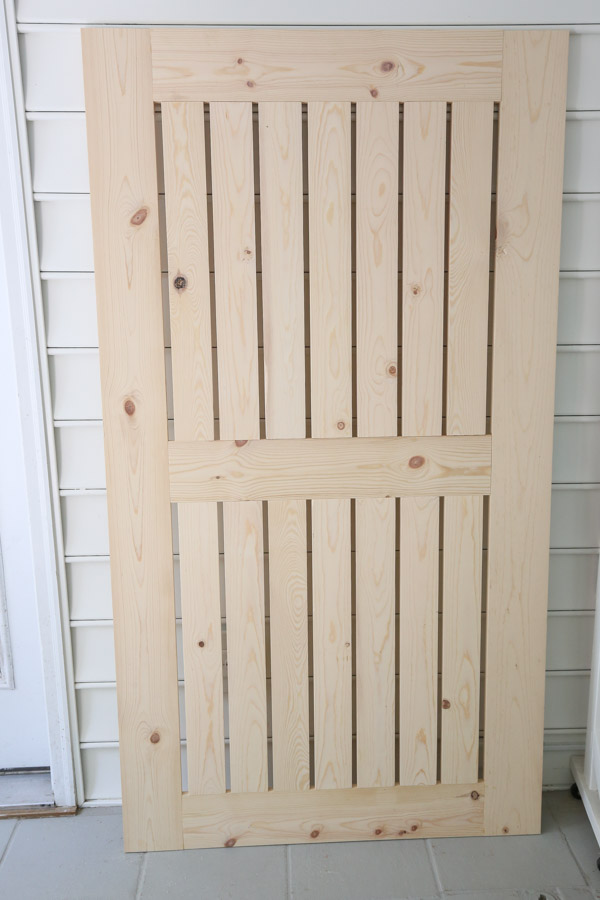
3. Assemble the DIY outdoor dining table top
Begin assembling the table top.
There are a few ways to do this but because there are so many slat boards to attach we found it easiest to assemble the first square section of the table and then the second square section.
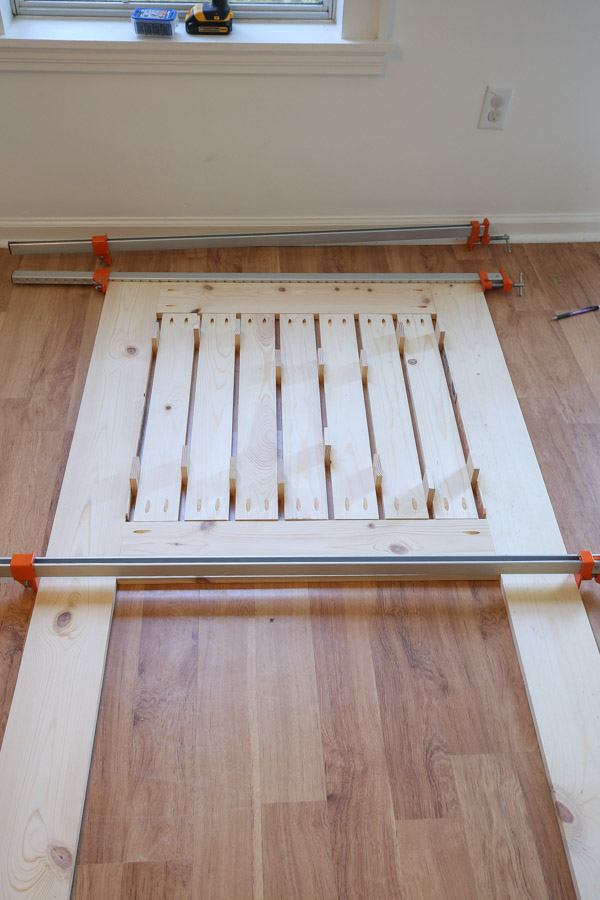
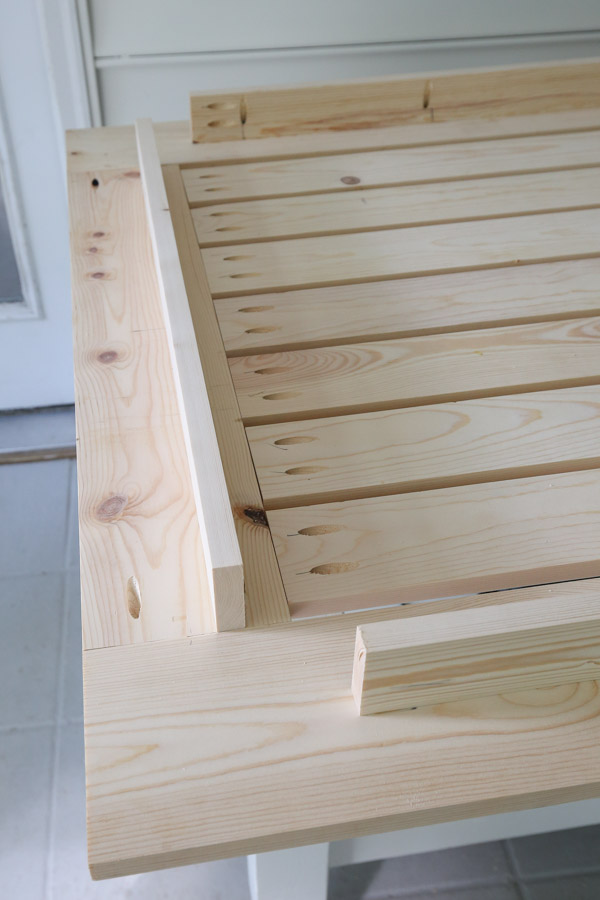
First, we clamped one side of the table frame together with waterproof wood glue by clamping one of the 1×6 @ 28 1/2″ boards between two of the 1×6 @ 72″ boards as shown below.
Then, we cut the 1/2″ thick 1×3 board into 16 spacers (about 2″ wide each) and used them to space seven of the 1×4 @ 27 3/4″ slat boards 1/2″ apart from each other.
After doing this we realized there was about a 1/4″ extra spacing between the boards due to the 1/2″ thick spacer blocks actually being a tiny bit less than 1/2″ thick which can sometimes happen in the wood milling process.
To fix this problem we added one 1/8″ thick paint stick on each end for a perfect spacing fit. In the end you can’t tell at all visually there was a difference!

Then, we added the middle 1×6 @ 28 1/2″ frame board in place with wood glue, clamped everything in place, and attached all of the boards together with 1 1/4″ weather resistant Kreg screws.

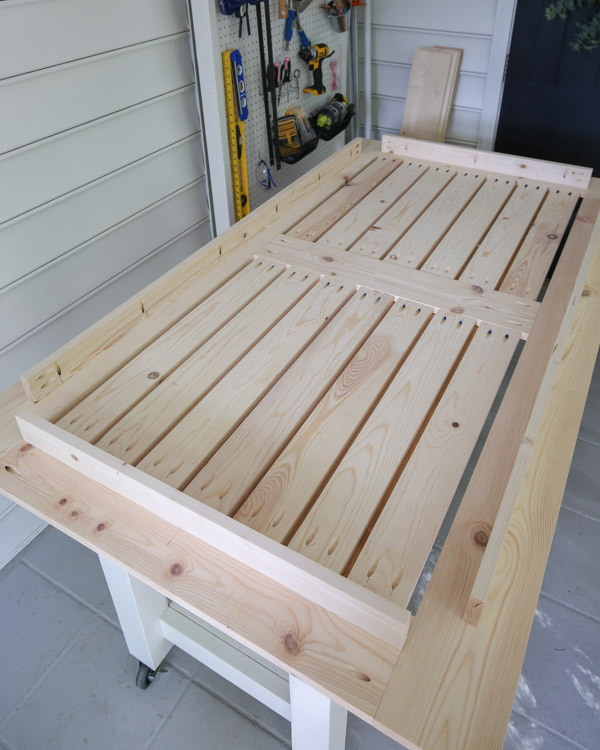
After screwing all the boards together, remove all of the spacers.
After the first half of the table is assembled, repeat the above steps for the other half of the table.
Note, you can see all of this in action in the DIY outdoor table VIDEO here!
4. Attach the table aprons to the DIY patio table top
Now it’s time to attach the table aprons.
On the bottom of the table top, mark the center point, 2 1/2″ in from the table edge along one of the 1×6 @ 72″ frame boards. This is where the center point of your 1×3 @ 59″ table apron should be attached (make sure pocket holes are facing down towards to the table).
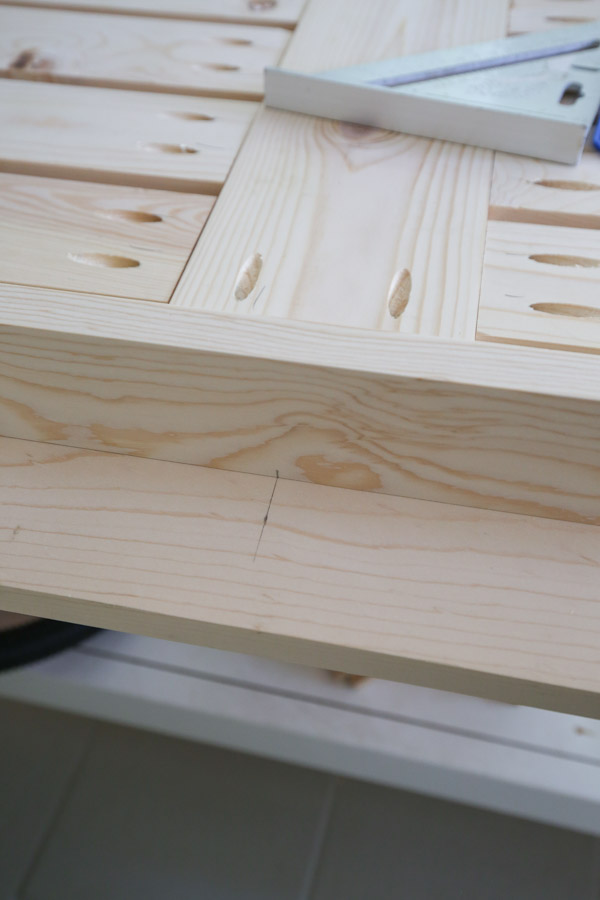
It also helps to add two more marks on each side of the 1×6 @ 72″ board that are 2 1/2″ back from the table edge to make sure the apron is attached equally spaced from the table edge.
Attach the apron in place with wood glue and Kreg screws.
Repeat this step on the opposite side with the second 1×3 @ 59″ table apron.
Then, repeat these steps again for the two (2) 1×3 @ 28 1/2″ table aprons, except these aprons should be 3 1/2″ back from the table edge.
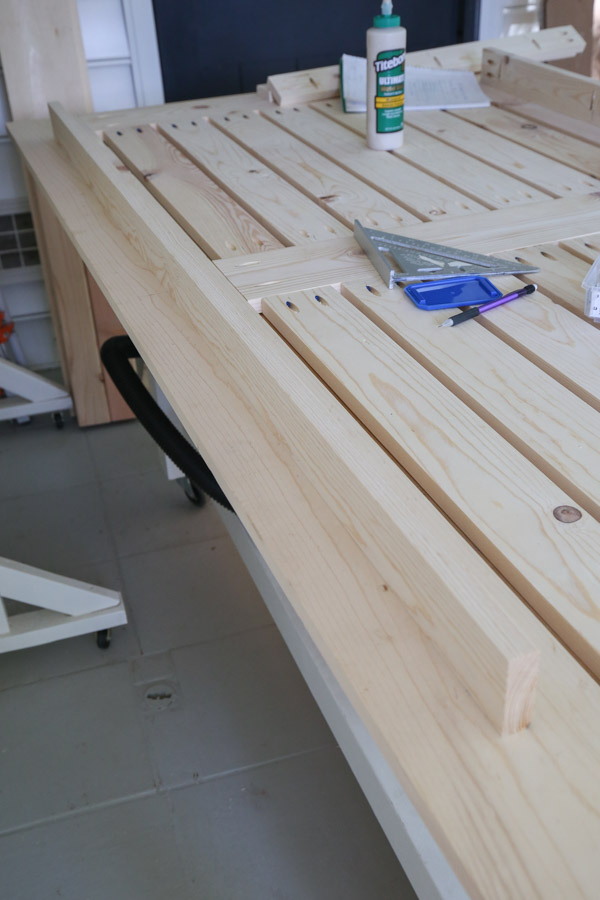
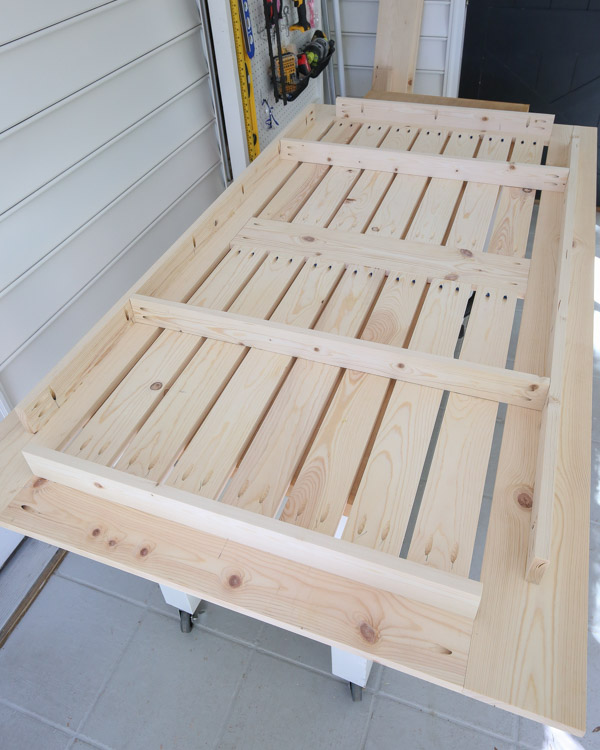
5. Attach the table top support boards
Read more : 7 Creative Ways to Hide Outdoor Security Cameras Like a PRO!
After the aprons are all attached to the DIY outdoor table, the two support boards can be attached.
Measure the exact distance between the two longer table aprons and cut two 1x3s to this size. It should be 33″ but it’s important to measure for any slight variations as you want a perfect fit.
Attach the two 1×3 support boards with 1 1/4″ Kreg screws on each end to the longer table aprons, centered perpendicularly over the slat boards on each side of the table.
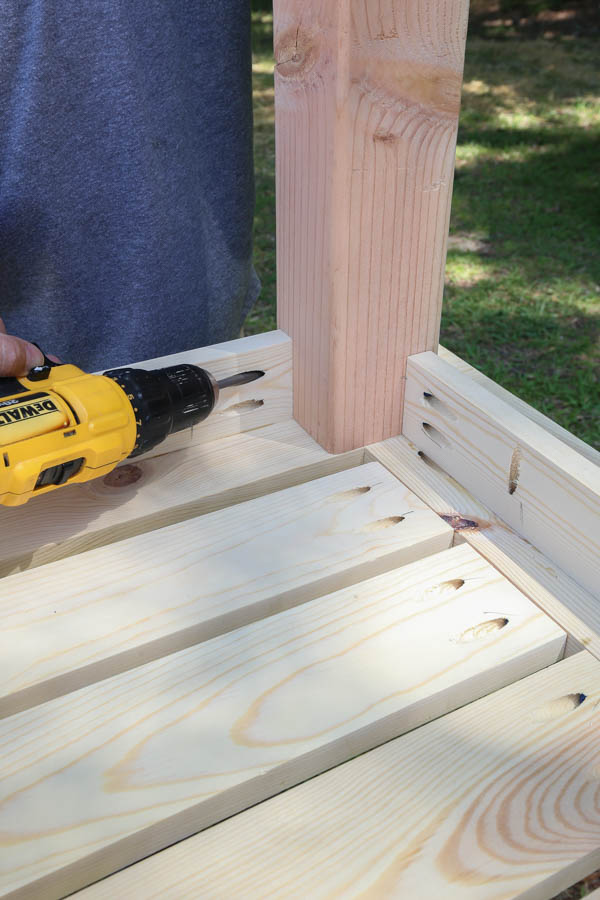
6. Install the table legs to the table top
The last build step for the DIY patio table is to attach the table legs to the top.
Place the 4×4 legs in place on each table apron corner, they should fit perfectly. Attach them with a generous amount of wood glue and 1 1/4″ Kreg screws.
Note: we made these table legs permanently attached but if you want them to be removable you can use corner brackets instead. I have a tutorial on how to install removable table legs with corner brackets!
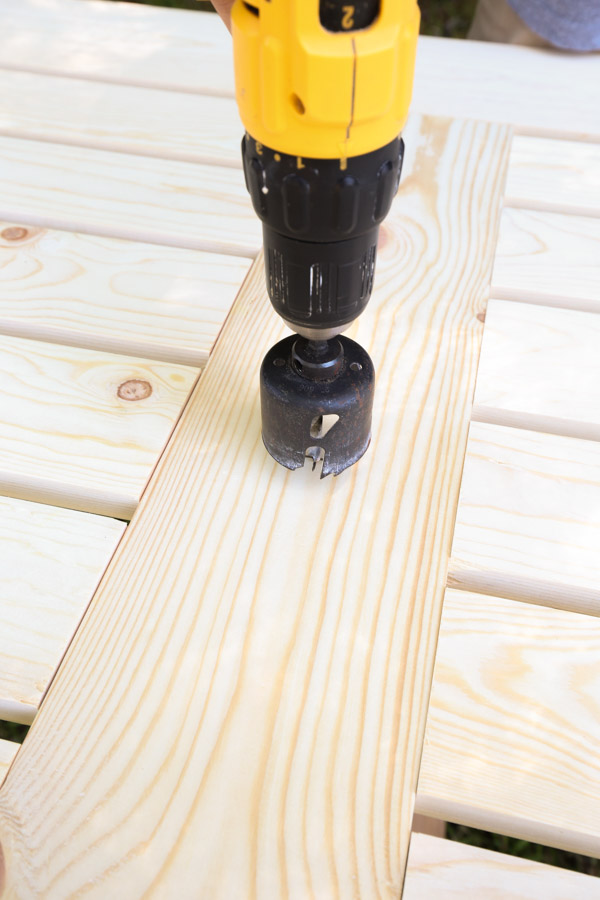
7. Drill the umbrella hole (optional)
Finally, if you want an umbrella hole like us, mark the center point on table top and drill a hole with a 2″ hole saw bit.
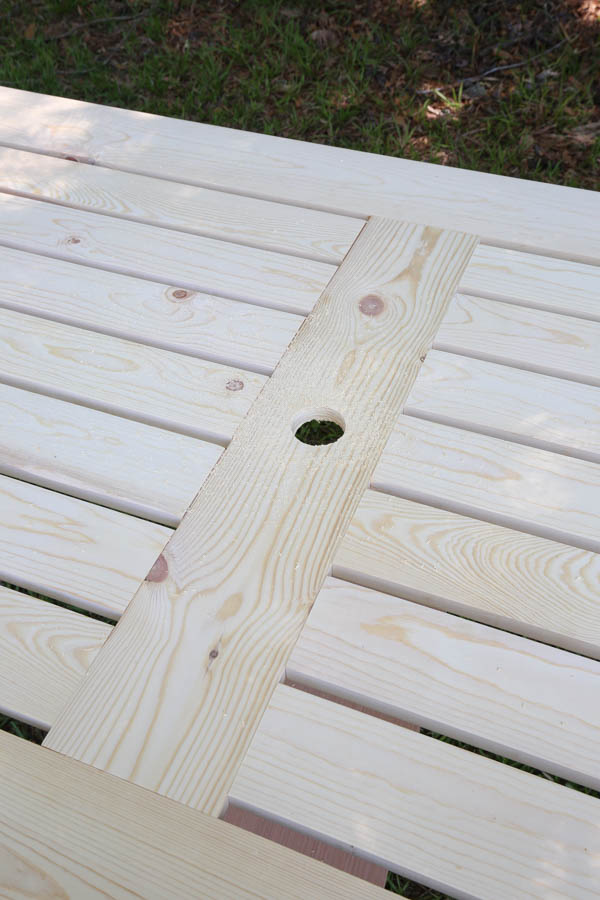
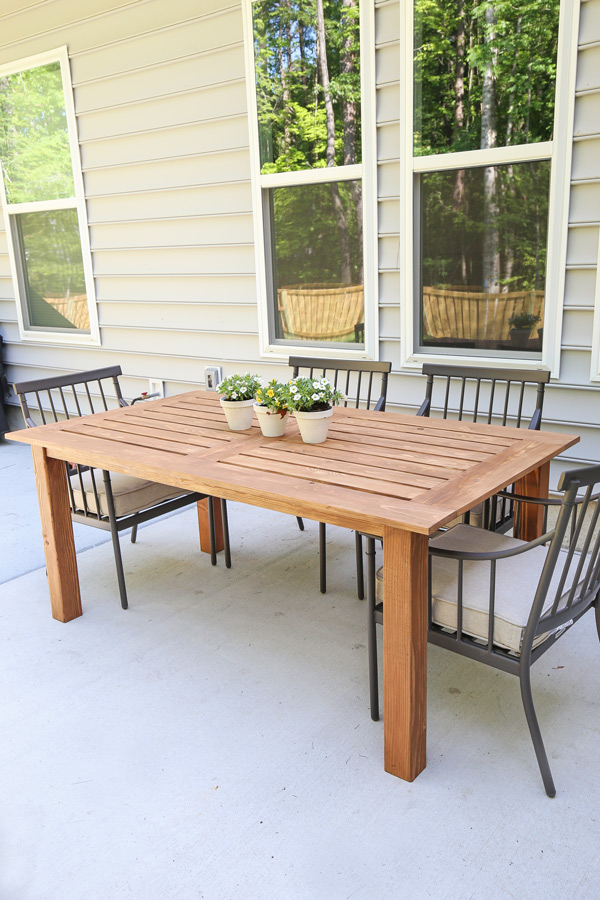
And that’s it for the build!
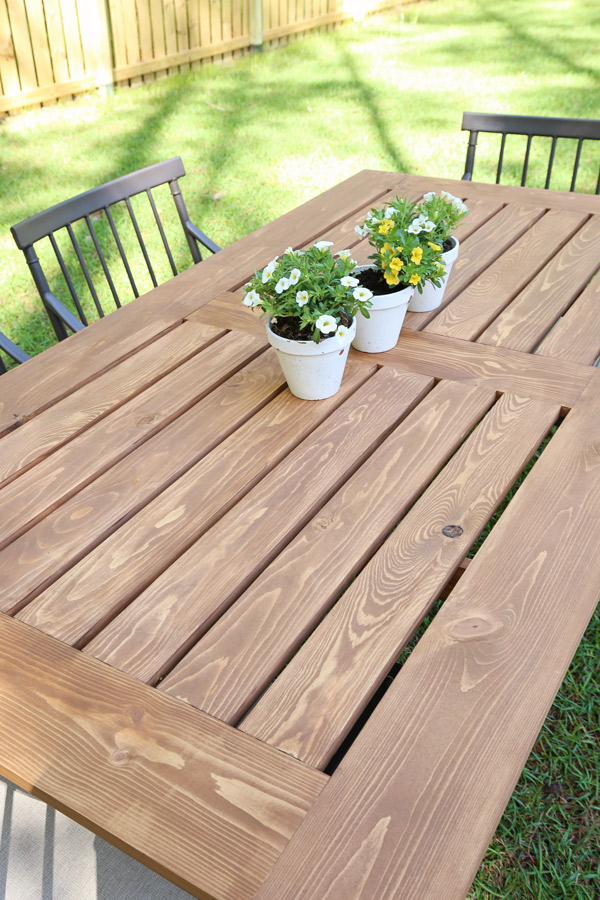
8. Stain the DIY outdoor table
Before staining the table, make sure to sand down any joints that don’t sit flush with each other.
We stained our DIY outdoor table with this exterior stain by Valspar in Pinebark. It’s the same stain color we used for our other outdoor furniture, the coordinating DIY outdoor couch and DIY outdoor chair and DIY outdoor side table and DIY outdoor coffee table!
This stain does dry fast and is a bit harder to work with so you have to work quickly. Also, a foam brush helps to get between the slats for staining.
See my tutorial on how to stain wood for a beautiful finish and the best way to apply stain!
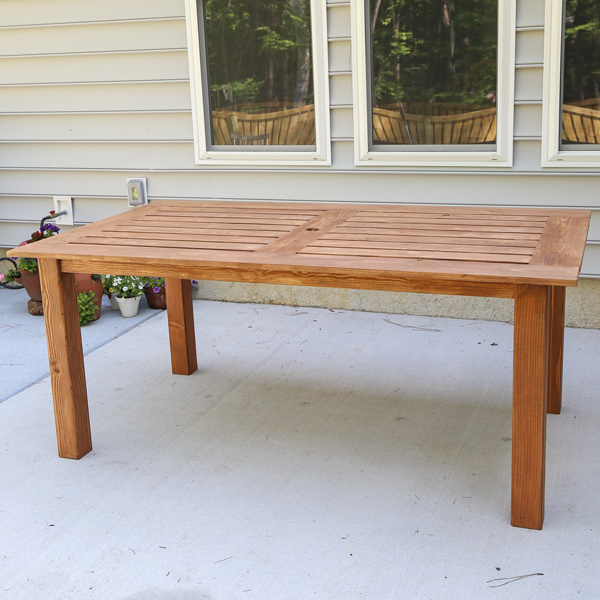
I’m super excited to start using our new DIY outdoor dining table and outdoor dining chairs and being able to eat meals outside!
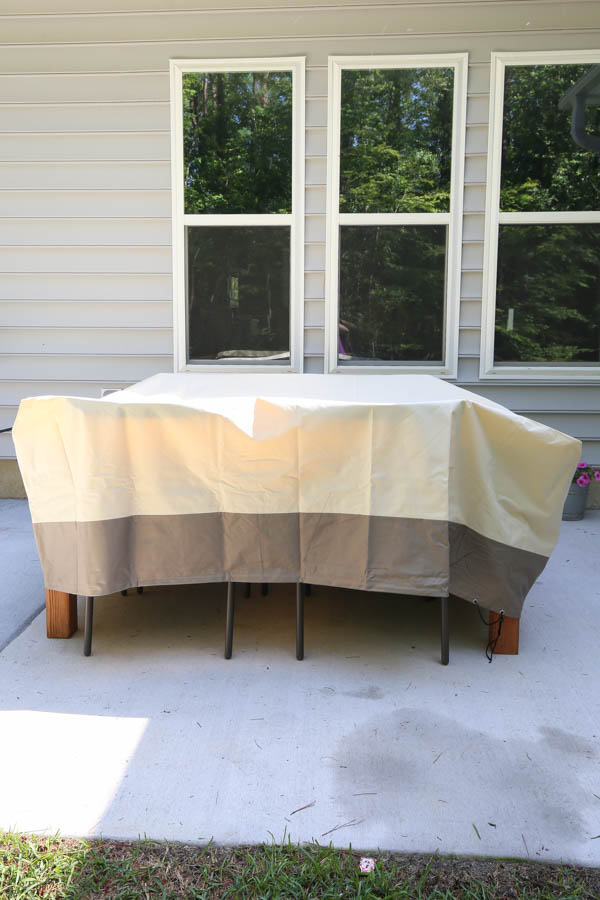
Protecting the DIY Outdoor Patio Table and Chairs
We are planning on leaving this outdoor table and chair set out year round here in Charleston. It won’t be on a covered patio, so it will be fully exposed to all of the weather elements.
Originally, I found this inexpensive outdoor furniture cover to go over both the chairs and table together to help protect the set and keep it clean from the weather longer term! UPDATE: Our original cover ripped (shown in below photo), so I recently replaced it with this heavier duty furniture cover. Hopefully it’s better quality!
Don’t forget to download the printable DIY outdoor table plans and to check out the outdoor table how to video!
If you make this table, please share it with me on social media @angelamariemade! *You can also share your build in our Woodworking for the Home facebook group, be sure to join!
Follow along on my latest projects and sneak peaks on Instagram, YouTube, and Pinterest!
Sharing is caring!
Source: https://gardencourte.com
Categories: Outdoor