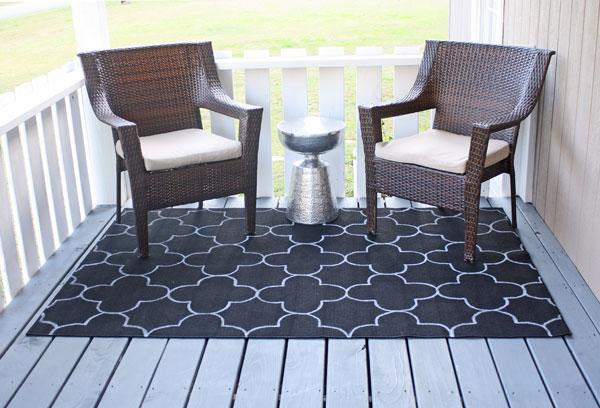
Why are outdoor rugs so expensive? Indoor rugs, I can kinda understand – because a good one can last you at least a decade. But outdoor ones might last a couple of years at best in our kinda weather. So when I started putting together things for our brand spankin’ new front porch, I knew I’d want to find a DIY outdoor rug solution. After some smart shopping and lots of thinking, I figured out how to get a pretty rug for under $25.

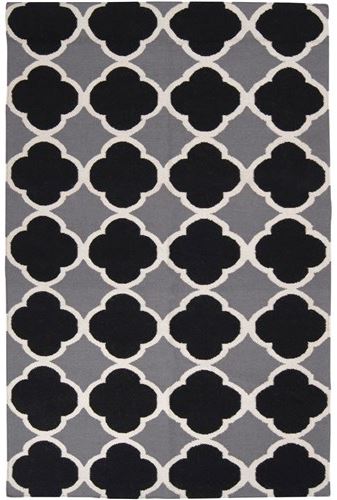
First, let’s take a look at the rug that inspired my DIY outdoor rug project. This pattern from Zinc Door was right up my alley – however the $358 price tag was not. I mean, we just spent like 90% of the budget on wood and paint and nails – this one thing would put me over budget in a heartbeat.
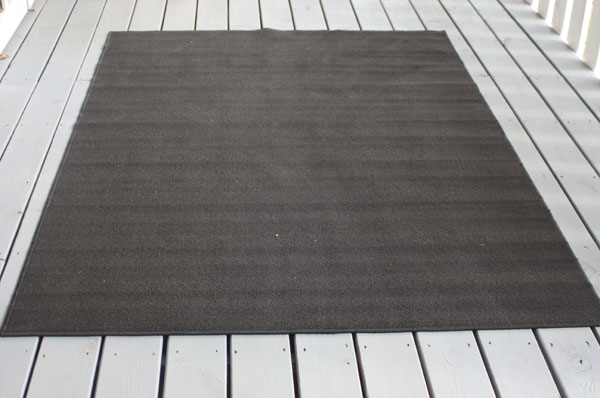
This rug, however, was $20 at my local Walmart. Yes, Walmart. It doesn’t say outdoor rug, but it’s made from the same material as my indoor/outdoor rug in our half bath that came from Ballard’s – and it’s under a roof, so I’m going to take a chance on it. $20 isn’t worth crying over if it gets wrecked in six months.
How to Paint an Outdoor Rug
Besides the rug, I also used:
- Scrap cardboard from an old box
- Pencil
- Cereal Bowl
- Chalk
- Water (in the cereal bowl)
- Fabric Paint
- Soft Bristle Paint Brush
- Scissors
- Measuring Tape

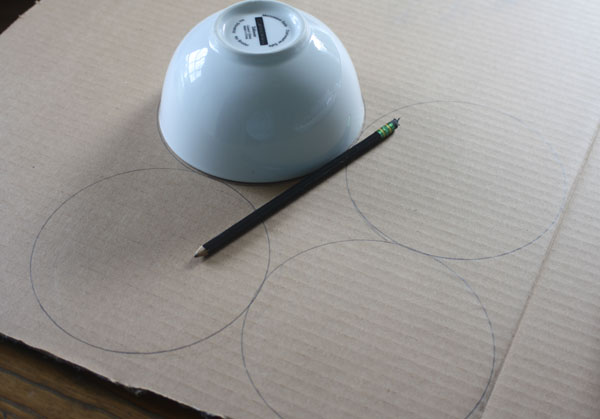
I started by tracing my bowl four times in a square pattern, with the edges touching.
Next, I used the scissors to cut out the pattern, just going right to where the circles meet on the outside, think like a four leaf clover.

Next measure your rug and place the pattern in the center. Using cheap – NOT DUSTLESS – chalk, trace around the pattern, then move it to the right and left, making a whole line all the way across the rug. Use the bowl to put water in to soak your chalk, because dry chalk won’t show up well – but wet chalk does. It will take a lot of chalk, so be sure to have 5-6 sticks to be sure you have enough.
Read more : How to Winterize Outdoor Faucets
Then, using your brush, paint right over the lines, I used my brush as the width guide. It won’t be perfect – but that’s ok, it just adds charm! Use the bristles to kind of work the paint into the rug a bit so it will be a fairly solid line.

I traced a line, painted it, traced a line, painted it, over and over until I was finished. You’ll probably have chalk smudges, but a vacuum will clean it right up after all your paint is dry.
Two hours of work and about $25 in supplies gave me the look I wanted for an outdoor rug without breaking the bank.
(Edited to add: I get a lot of questions about how the outdoor rug is holding up – and after two years it still looks great!)
Source: https://gardencourte.com
Categories: Outdoor

