What’s the best way to clean camera lenses? It’s one of the most asked questions in photography forums, and for a good reason.
Keeping your camera lenses clean from fingerprints and dust can help produce sharper, clearer images.
You are watching: How to Clean a Camera Lens the Right Way in 2023
The same applies to a lens protection filter – any glass that comes between your camera’s sensor and your subject should be kept spotless!
In this guide, you’ll learn how professional photographers clean their mirrorless and DSLR camera lenses.
(We’ll also show you a few DIY tips to do it with household items if you don’t own a lens cleaning kit.)
We’ve also answered some common questions surrounding lens cleaning, both for cameras and phones.
So get out your dirty lenses, and let’s start cleaning!
What Tools do you Need for Cleaning Camera Lenses?
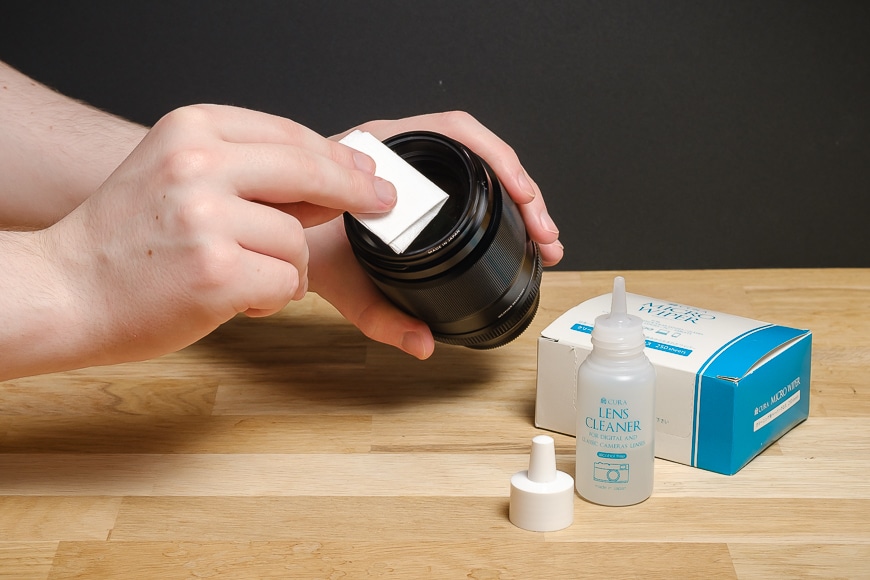
1. Lens Cleaning Liquid – To remove oil left by finger smudges and watermarks left by rain, you’ll need a liquid cleaning solution. These contain alcohol or are alcohol-free – some alcohol-based solutions impact the lens coating on vintage lenses. I use an alcohol-free liquid made by CURA in Japan, but camera stores sell something similar.
2. Microfiber Cloth – A high-quality microfiber cleaning cloth is an essential part of any lens care kit – I recommend always having one in your camera bag.
3. Lens Tissues – Regular tissues leave fibres all over the place. Special lens cleaning tissues have a tight weave of fibres that don’t fragment. I used CURA Micro Wiper papers. These are also highly recommended for camera lens repair too.
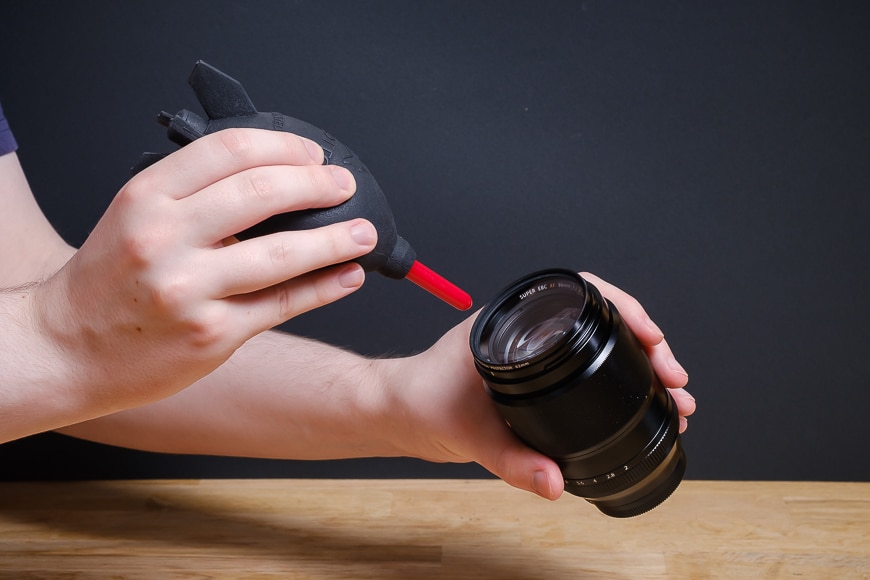
4. Blower – A dust blower is a perfect tool for removing large specks of dust and debris. I use a Giottos Rocket Blower in my care kit.
5. Soft Lens Brush – If you don’t like using a blower to remove dust, a soft bristle brush clears it away. I use a CURA Kabuki Lens Brush with super fine bristles that don’t fall off the brush.
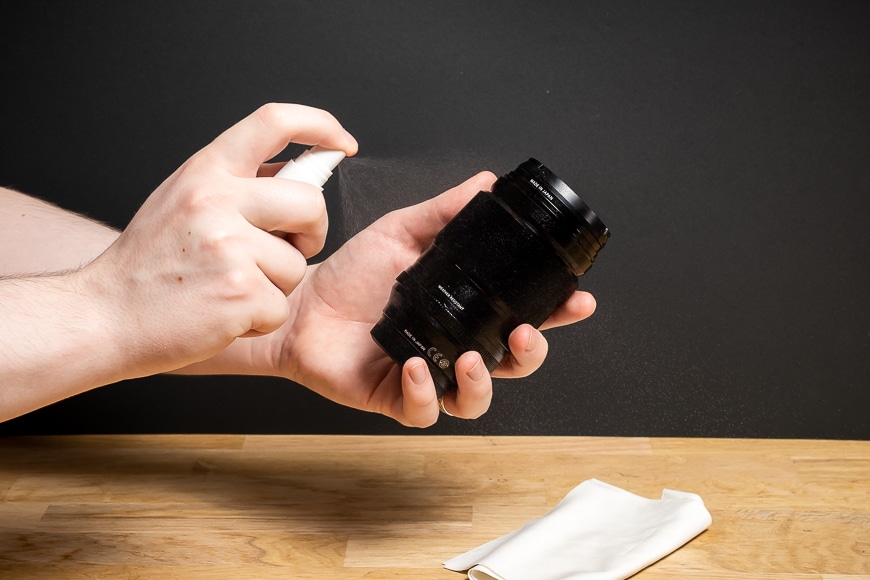
6. Camera Cleaning Spray – While not specific for lenses, it’s worth having an antistatic and non-alcohol-based camera body cleaning spray. I used the CURA Camera Body Cleaner.
7. Cleaning Kit Pouch – Find a clean, sealable plastic container or pouch to store all of the above gear. If you have it all rattling around in a draw, it’ll get dirty and dusty. Please keep it clean so it’s ready to clean your gear every time.
You can also get by with a LensPen cleaning kit, which includes almost all of the above.
How to Clean a Camera Lens (The Pro’s Way)
Here’s how professional photographers keep their camera lenses in pristine condition.
Give this lens cleaning routine a go the next time you get back from a photoshoot.
Step 1: Take Preventative Measures

One of the best steps in caring for your lenses is taking preventative measures and adopting some good care habits.
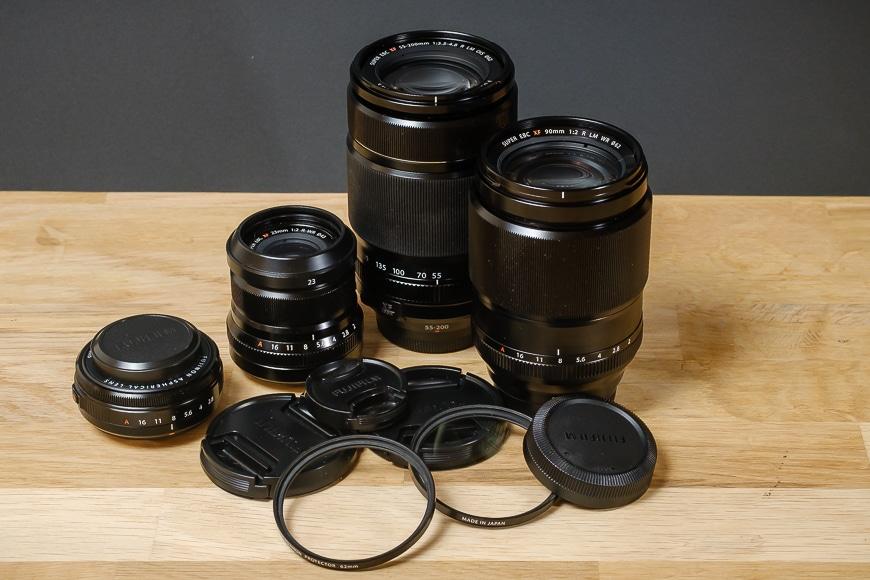
Camera lenses are expensive, so it’s worth investing a small fraction of that cost in a protective or UV filter. They come in a range of sizes to suit lenses. Buy a cheap protective filter and place it on the front of your lens as soon as you get it out of the box.
Keeping a lens filter clean is no different to keeping the fixed front lens element clean. The benefit of applying one is that if you scratch or damage it beyond repair, you can throw it away, and your lens is still in pristine condition.
Be sure to replace the UV protection filter straight away – if you were silly enough to damage a lens once, chances are you’ll do it again!
Another good habit is to keep the front and rear lens caps on your lens at all times. They serve as perfect protectors against dust, dirt, oils and sticky fingers.
Step 2: Blow Away Dust

Before you even touch a cloth or lens tissues, you need to use a blower to remove the loose dust and debris from the lens glass.
We do this step first for an important reason; if you use a cloth first, you might scratch the glass while wiping dust pieces away.
Working in good light, with the lens facing upward, blow across the lens from a 45-degree angle from one side of the lens to the other.
The lens blower is better than blowing with your mouth as you may accidentally blow saliva onto your lens.
Plus, with a blower, you can achieve fast successive puffs of air from one side to the other.
Step 3: Brush Away Stubborn Particles

Achieve the same outcome of removing dust with a soft-bristled brush – if you’re unlucky enough to have sticky specks of dust or dirt on your lens, a blower won’t budge them.
If you’ve been out shooting in wet weather, you’ll probably see plenty of these specks.
A lens brush can also get into the tight grooves around the edges of the lens glass.
Have your lens facing upwards and use very gentle sweeping actions from one side of the lens to the other.
Don’t push down hard on the brush, as you may scratch the lens if a big piece gets stuck in the bristles.
Step 4: Use A Cleaning Solution

Now that you’ve brushed and blown away the larger particles of dust and grime, it’s time for a serious clean.
For this step, you’ll need lens cleaning liquid and lens cleaning tissues or paper.
Using a suitable lens cleaning fluid ensures you don’t damage the protective coatings that the lens manufacturer applied to the glass. Whatever you do, don’t use Windex, Glen20 or any other chemical cleaning fluid.
Take a folded lens cleaning paper or lens tissue and apply 3-5 drops of the lens cleaner onto it. With the lens facing upright, hold it firmly with one hand.
Take the damp lens cleaning tissue in your other hand and gently wipe across the lens surface. Use a side to side motion rather than a spiralling motion if possible.
Once you’ve wiped all of the surface, take a clean and dry piece of lens cleaning tissue to gently wipe away any remaining moisture.
Wait for the lens to completely dry and inspect the surface to ensure that you removed smudges, oils, fingerprints and stubborn grime.
Read more : Homemade Apple Tree Spray: Make Your Own and Save Money
If necessary, repeat this step to ensure that you have streak-free glass. If you don’t have lens papers, use a microfiber lens cloth.
Step 5: Use a Microfiber Cloth

Now that the lens is clean, it’s time for the final polish. Provided you have gone through steps 1 – 3 and cleaned your lens effectively, you can use a soft and fine-weave microfiber cloth to get a sparkling finish.
Just remember, if you do this before steps 1 – 3, you may drag dust around the surface of the lens and scratch it!
Depending on the size of the cloth, fold it into a padded square or triangle.
With the lens facing upright and held firmly in one hand, hold the folded microfiber cloth in the other.
Gently wipe the glass to remove any remaining streaks from Step 3.
As you’ve removed any hint of dust and grime, you can use the microfiber cleaning cloth in a left-to-right motion or a circular one.
Step 6: Clean The Rear Element

While you’re going to the trouble of polishing your lens’s front glass element, take a moment to consider your rear. Not YOUR rear, but the rear of your lens!
Some rear elements are easy to clean, while others recess into the lens body.
Follow steps 1-4 as outlined above – you may need to use the corner of a lens paper and microfiber cleaning cloth, or a Q-tip, as the rear element will be much smaller.
Step 7: Don’t Forget the Barrel

With the front and rear glass elements sparkling like new, it’s time to finish the job.
Chances are, if the glass needed a good clean, the lens barrel would also need a clean.
Zoom lenses can get dust and dirt caught in the gap where the zoom extends – clean this regularly to prevent dust from being pushed inside the lens.
Remember that not all lenses are weather-sealed, and as such, you should be very careful using liquids when cleaning the lens barrel.
Fit the rear and front cap to your lens and use the blower and brush to clean out all the nooks and crannies of your lens
There are also liquid solutions for cleaning the outside of lenses and cameras – if you have access to one, use it. If you don’t have access, dampen the corner of a microfiber lens cloth with water and carefully clean the lens.
Once done, store your lens in a clean camera bag, lens pouch or in a cupboard rather than an open shelf where dust will fall on it.
How to Check if Your Camera Lenses Need Cleaning

To check if you need to clean your lens, you first line them up and perform a military-grade inspection!
Visually checking your lenses’ cleanliness, especially before an important shoot, is an excellent habit to have. That way, you know your image quality will be top-notch.
If you’re reviewing your photos and notice spots and marks on the image – it may be a dirty lens.
But there are other ways to test if your DSLR or mirrorless camera lenses need cleaning:
- Focus on Infinity: Set your lens to manual and focus on the furthest object and then lock focus or don’t touch the focus ring again.
- Set a Narrow Aperture: Set the lens to a narrow aperture such as f/16.
- Take A Photo: With the lens pointing at a plain white surface or a clear blue sky, take several shots.
- Check For Spots: Either on the camera LCD or a computer, zoom in on the image and check every part of the frame.
- Seeing Spots: If you see dark spots, streaks or lines, the sensor needs cleaning. See: Can you clean your camera sensor?
Keep this guide on how to clean a camera lens bookmarked on your phone. Next time you notice those dark spots or streaks on your lenses, you’ll be able to refer to it and take immediate action!
How to Keep Your Camera Lenses Clean

They say that prevention is the best medicine. The same applies to looking after your camera gear and lenses – if you prevent them from getting dirty, you won’t have to clean them as often.
However, let’s face it, dust is everywhere. It’s going to get onto your camera and lenses no matter what you do. Plus, taking your lenses outdoors is going to result in getting dirt all over them.
If the great pandemic of 2020 has taught us one thing, it’s that we touch things with our hands more than we realise. One of the biggest enemies in keeping your camera gear clean is the humble fingerprint.
Let’s take a look at the best ways to keep your camera lenses clean:
- Store your lenses in a dry and contained space.
- Avoid your lenses sitting on shelves as they attract dust like a magnet.
- Ensure the inside of your camera bag is clean and free of dirt and other debris.
- Buy a couple of microfiber cleaning cloths and have one at home and one in your camera bag at all times.
- Buy lens cleaning gear such as a cleaning liquid, cleaning brush and dust blower.
- Protect the front element of your lenses at all costs – a deep scratch can ruin a good lens. Consider using lens hoods as protection.
- Clean your lenses regularly but always use a gentle touch.
- Always keep the front and rear lens cap on your lenses when not attached to a camera.
- When changing lenses, keep the rear lens element facing down, so dust does not fall onto it as you place it on your camera.
- Put a protective UV filter on your lens as soon as you get it out of the box and never take it off – it’s insurance against damage.
- Despite being weather-sealed, don’t wash your lens in the sink with the dishes.
How often should you clean your camera lens?
How often you clean your lens depends on how often you use them. If you like to go out and shoot every weekend, then get in the habit of sprucing up your lenses every Friday night.
When you think it needs it, clean your lens – don’t leave sticky residue on your lens for a long time.
How to remove moisture in a camera lens
If you find that there’s condensation or moisture inside your lens – all is not lost. There are a couple of simple ways to get rid of moisture:
- Place your lens inside an airtight container filled with uncooked rice – the rice absorbs moisture like magic.
- Use Silica Gel in the say way as rice – purchase Silica Gel from the supermarket or hardware store.
- Place the lens in direct sunlight to dry out the internal moisture.
- If that fails, take your lens to a camera repair store.
Household Items You Can Use to Clean a Camera Lens

If you don’t own a dedicated lens cleaning kit, here are some items you might have around the house to use in a pinch.
They’re not ideal, but it’s better than having a dirty lens or spending a fortune at the camera store!
1. Microfiber Cloth – If you or anyone in your house wears glasses, chances are you have microfiber cloths on hand – don’t use regular cloth or tissue.
2. Eyeglasses Cleaner – It’s readily available at the local optometrist and given out when you buy glasses or sunglasses.
3. Your Breath – If you blow hot breath onto the lens surface, condensation will cover the lens. Use a soft material such as T-shirt material to wipe the glass clean.
4. Turkey Baster – That Thanksgiving turkey baster will get more use than just one day a year! Use it to puff clean air across the surface of your lens to remove large particles of dirt and dust.
5. Large Eye-Dropper – A large eye-dropper can work in the same way as a turkey baster to blow away dust and debris.
6. Makeup Brush – Use a high quality, soft makeup brush to sweep away dust and dirt.
How to Make DIY Lens Cleaner
Read more : How to make Paper Mache Paste from Flour
To make a DIY lens cleaner follow these simple steps:
1. Find a small spray bottle similar to the ones used for spraying eyeglass.
2. Fill halfway with 99% Isopropyl Alcohol – don’t use anything with a lower percentage or other added ingredients.
3. Fill the remaining half of the spray bottle with distilled water.
4. Shake gently to mix the contents.
How to Clean a Dirty Phone Camera Lens

If you’ve ever wondered if you can clean your iPhone camera with alcohol or how you can get scratches out of a phone camera lens, here are 7 tips to get you shooting again:
1. Cleaning Cloth – Use a microfiber cleaner to wipe away dust, moisture and fingerprints from your iPhone camera lens.
2. Cleaning Fluid – Apply a lens cleaning fluid such as the sort used to clean reading glasses.
3. Q-Tip – Dab a Q-Tip in distilled or tap water and gently clean the lens surface.
4. Wipes – Use disposable lens cleaning wipes that already have a cleaning solution applied.
5. Your Breath – breath hot air on the camera and gently wipe it clean with the corner of your shirt.
6. Lens Sticker – Apply an adhesive, transparent protector to your clean lens.
7. Toothpaste – If you have a stubborn scratch and all else fails, use gentle children’s toothpaste – seriously! With the corner of a microfiber cloth, rub a small amount in a circular motion and then clean thoroughly.
Cleaning Camera Lenses FAQs
Can I use alcohol to clean camera lens?
Yes, you can use alcohol to clean a camera lens. I recommend using 99% Isopropyl Alcohol diluted with distilled water at a ratio of 50/50.
Some variants of Isopropyl Rubbing alcohol have less than 99% and include other agents that leave sticky residue on your lenses.
Can you use glasses cleaner on camera lens?
Yes, glasses cleaner is an excellent way to clean your camera lens along with a microfiber cloth or special lens cleaning tissues.
How do you clean a blurry camera lens?
If your camera lens is taking blurry photos, you need to clean it carefully. Start with a blower to remove larger dust and dirt particles. Then spray it with a lens cleaning solution and wipe gently with a microfiber cloth. You may have to repeat this more than once to get a crystal-clear lens.
Can you clean the inside of a camera lens?
No, you shouldn’t clean the inside of the camera lens as the manufacturer sealed it to retain the integrity of the mechanisms inside. If you have dust inside, take it to a camera service centre or contact the manufacturer.
Can I clean my camera lens with a microfiber cloth?
A microfiber cleaning cloth is the best piece of equipment to clean your camera lens – always having one in your camera bag.
Can I use Windex to clean a camera lens?
Don’t use cleaning products such as Windex to clean a camera lens as they are too harsh and impact the coatings applied.
Can you repair a scratched camera lens?
Yes, a scratched camera lens is repairable to some extent – it depends on how deep the scratches are.
A camera service centre can polish a lens to remove minor scratches. However, this will also remove any special coatings applied by the camera manufacturer.
Does a scratched camera lens matter?
Minor scratches that are barely visible to the human eye don’t matter as much as deeper scratches. In most cases, they won’t overly impact image quality. Deeper marks and scuffs will show up in your images.
Are Zeiss Wipes safe for camera lens?
Zeiss Wipes are ideal and perfectly safe for cleaning camera lenses. These have been made specifically for cleaning camera products.
How do you clean fungus from a camera lens?
The easiest way to clean fungus from a camera lens is to place it in direct sunlight – UV light kills most fungi.
If the fungus is outside the lens, you can mix white vinegar and water to clean it away carefully. If you have persistent fungus inside the lens, take it to a camera repair centre to have the lens dismantled and cleaned thoroughly.
How to Clean a Camera Lens | Final Words
You’ve spent hundreds or thousands of dollars on camera lenses… and regardless of being a hobbyist, enthusiast or professional photography, you’d be crazy to not look after them!
With a few preventative measures combined with a regular cleaning regime, there’s no reason why your lenses can’t still look brand new a decade from now.
After all, manufacturers build lenses to last a lifetime – that’s why there are so many vintage lenses still available on the second-hand camera market.
Now that you know how to clean a camera lens, I expect you to spend the weekend sprucing up your gear! That way, you’re guaranteed to get the best quality from your lenses and capture stunning images.
What’s your cleaning process for caring for your camera lenses? Do you have any other tips, suggestions or advice for cleaning lenses?
Join the conversation by commenting or asking questions below. Happy shooting!
Source: https://gardencourte.com
Categories: Recipe


