The following project and photos first appeared at NewYorkRenovator.com. Building an outdoor cat shelter is a good project if you have ferals, sorta-ferals (semi-wild cats who won’t come indoors, but will sleep in your basement or garage), or inconsiderate neighbors who leave their cats outside in horrible weather. The resulting house is insulated and cozy, and it costs about $40 to build.
Why build a DIY outdoor cat shelter?
We’ve adopted a few feral cats who have homes outdoors. Well, not exactly outdoors — one sleeps in the attached garage and one sleeps in the basement (we have small hatches for both areas). Both areas are warmer than the cruel outdoors, but Upstate New York winters can be pretty rough on a critter. My feral cat, Milo, an orange tabby, is an old geriatric at 12 years old, and we had to ditch his comfy but dirty old stuffed chair last year. I did some searching, and came up with a terrific idea for an outdoor cat shelter for winter. I got the basics of the idea at the PACT Humane Society website, which gives lots of ideas and tips for sheltering kitties during the winter. I decided to make the simple plastic container outdoor cat shelter for Milo, with a few adjustments. I post what we did, here, in case anyone searching for ideas can use it.
You are watching: How to Build a DIY, Insulated Outdoor Cat Shelter (With Pictures)
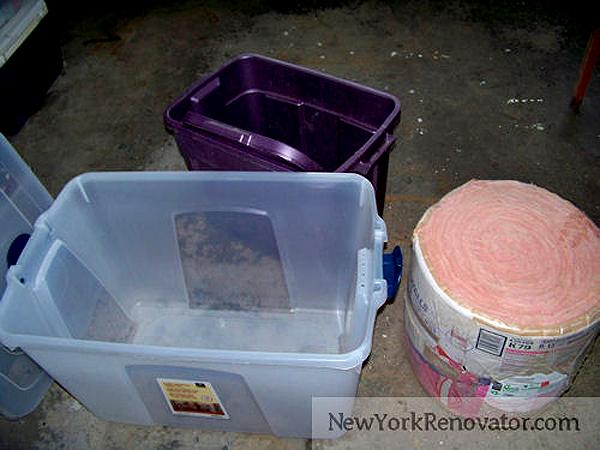
This is a very inexpensive shelter, and it’s easy to build. The most difficult part of the construction is cutting the plastic holes, a task we found arduous. I read one tip (after the fact, ugh) that suggested heating the plastic buckets with a hairdryer to soften the plastic, and thus make the cutting of the holes easier. I wish I’d known that beforehand!
Supplies you’ll need to build an outdoor cat shelter:
- A 30-gallon plastic tub with lid ($9.49 at Target.com)
- An 18-gallon plastic tub with lid ($5.49 at Target.com)
- A roll of fiberglass insulation or a sheet of rigid 1-inch foam board insulation/polystyrene (fiberglass insulation costs $10.98 at Lowes.com; a 4-by-8-foot sheet of 1-inch foam board costs $11.98 at Lowes.com.)
- Duct tape ($4.98 at Lowes.com)
- A box cutter or heavy-duty carpet scissors to cut the plastic ($5.98 at Lowes.com)
- A bottle of Great Stuff (or whatever brand) expanding foam ($6.20 at Lowes.com)
How to build an inexpensive and insulated outdoor cat shelter
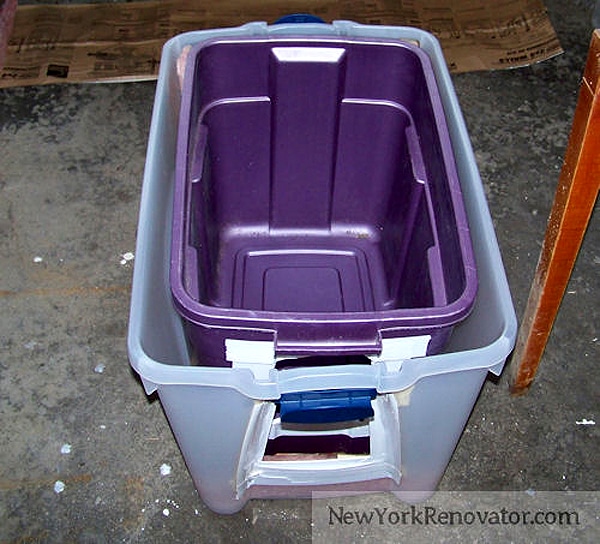
We cut a generously large hole, because Milo is a little skittish. A small hole with no other opening might have spooked him. Cutting the plastic was hard. By the time we made a second, bigger shelter for the dog, we were pros. But the first time was kind of tough.
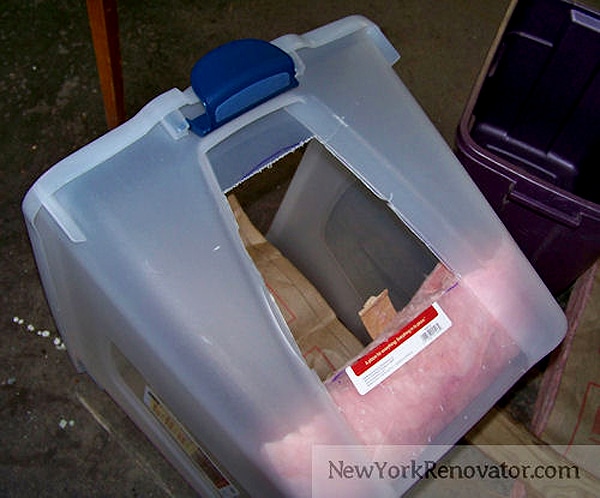
I taped the hole edges with duct tape, because the edges were a little rough.
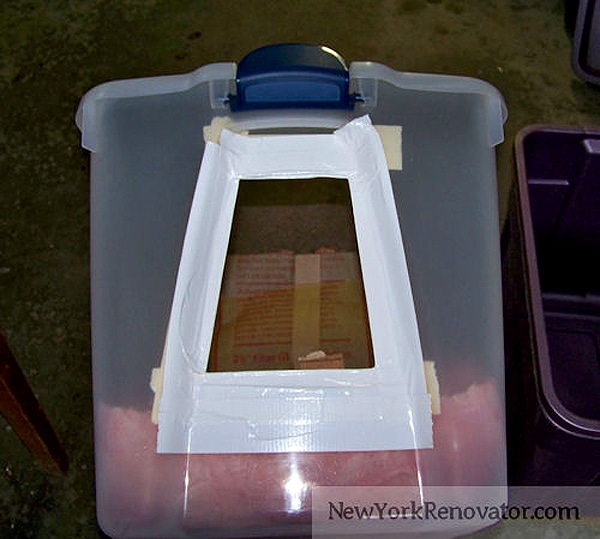
And doesn’t the tape make the box look fancy?
OK, so we put a layer of fiberglass insulation on the bottom of container No. 1, and tested out the hole placement for container No. 2, so the holes would line up. Then, we cut the second hole for container No. 2.
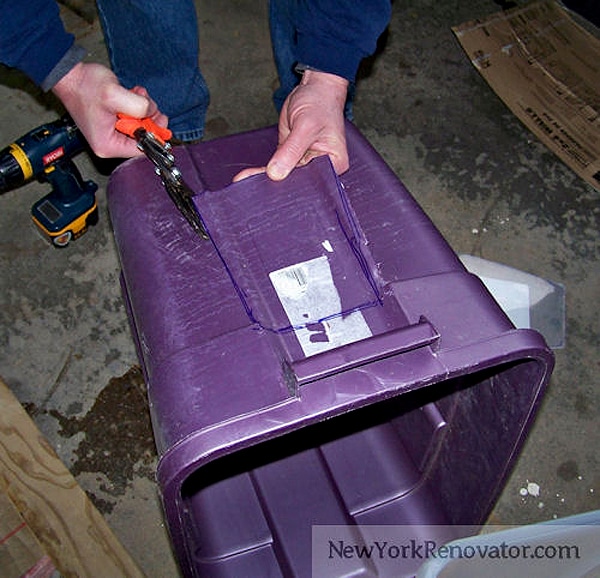
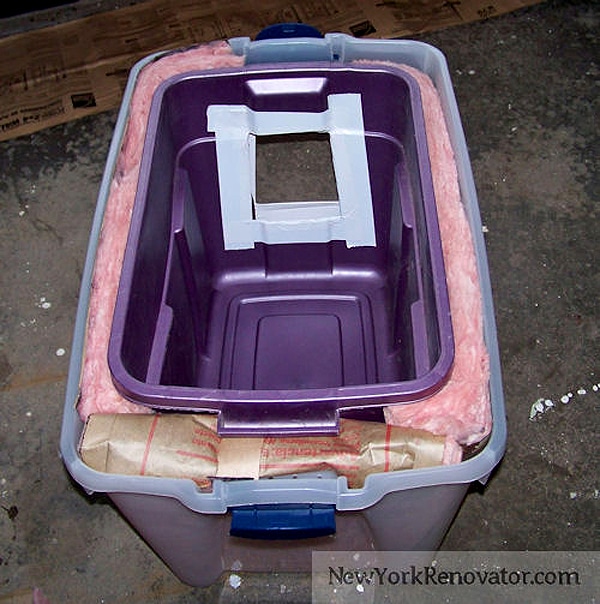
Once the holes were cut and *relatively* aligned, we placed layers on insulation between the containers. I think using fiberglass insulation batting is MUCH easier than measuring and installing rigid foam. However, cats like to pull (and sometimes eat) fiberglass insulation. You have to make sure that no insulation is sticking out.
Read more : Global Environment
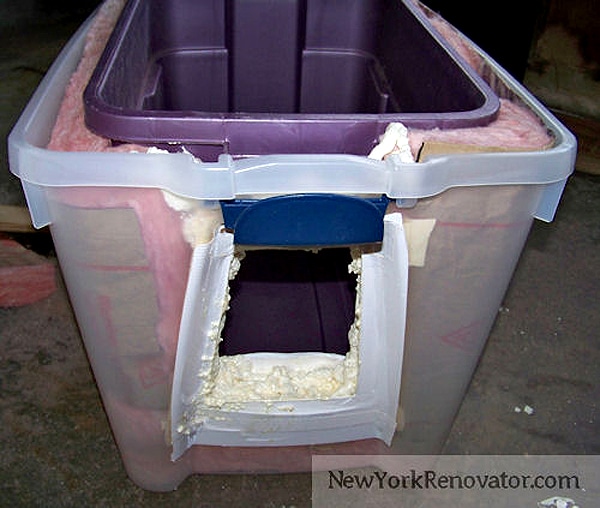
So what I did to resolve this was spray some of that Great Stuff Expanding Foam between the two layers where the holes were showing insulation. The expanding foam will not adhere to the plastic, but it will adhere to itself. I sprayed it all around the hole, creating a ring. It hardened and is preventing any insulation from showing. It also creates an airtight seal around the hole’s opening.
Once you have container No. 2 secure inside container No. 1, place the lid on the inner container No. 2. Place a strip of insulation on the top of the inner container, and place the lid for container No. 2 on to the entire set. Secure with duct tape, if necessary.
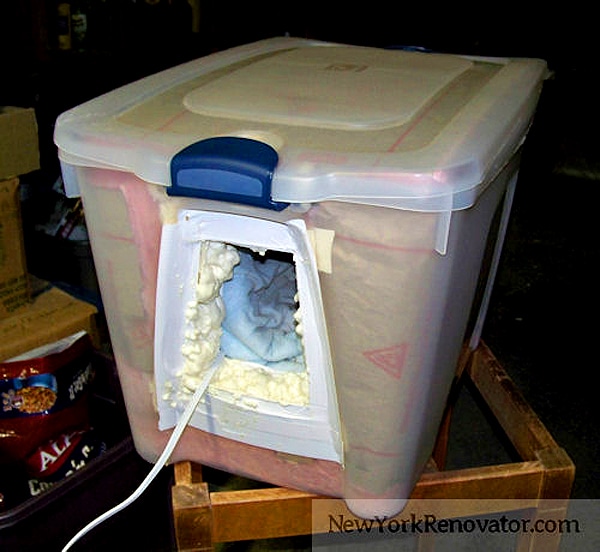
I also added a heating pad for those days when the temperatures reach below zero around here. Milo is a very fussy cat who hates to get into any containers (especially the cat carrier which means we’re going to the vet!), so he was hesitant about entering this new cat shelter for about a day. But temperatures dropped, and the heat of the heating pad was too much for him to resist. Now, he loves his shelter. I’d say that the setup cost me about $17, since I already had some supplies around the house. If I had to buy everything new, it’d probably cost me about $40. Not too bad for a hefty cat shelter. And a roll of insulation will be enough for two shelters.
Nice and toasty!
Thumbnail: Photography by Sun_apple/Thinkstock.
Read more about feral cats on Catster:
- 5 Ways Feral Cats Do More Good Than Harm for Wildlife
- How Do You Protect Outdoor Cats from the Winter Cold?
- How to Build a Feral Cat Shelter for the Winter
- How Do I Stop Feral Cats from Pooping in My Garden?
- Meet Sheila Massey, NYC’s Real-Life Cat Woman
- Have You Ever Helped a Feral Cat Become a House Cat?
Source: https://gardencourte.com
Categories: Outdoor

