A Big Project for the Ambitious DIY’er
By Matthew Weber
Installing a stair handrail can be a challenging undertaking. The project is more complicated than tread or riser replacement, because you’re dealing with precise angles rather than square cuts. The rail system must be securely supported by newels that are solidly fastened to the framing of the floor or wall. The rail must also adhere to strict code guidelines meant to ensure people’s safety.
You are watching: Stair Railing Installation – How To Install It Yourself
If you plan to tackle this project as a DIY’er, I can’t recommend strongly enough the need to carefully plan every aspect of the project before you order supplies. The cherry stair rail shown in this project appears courtesy of L.J. Smith Stair Systems, which provides detailed step-by-step instructions for installing the components. The company also provides a handy checklist of required parts and supplies to make sure you include all the necessary components and fasteners.
Check with your stair parts supplier for any special tools or accessories that will make the project go smoother. For example, to make installation of the stair balusters easier, we used L.J. Smith’s IronPro system. The IronPro system eliminates the need to to bore angled holes into a rail to house the balusters, relying instead on small screws and adjustable fittings. The system reduces the likelihood of error and installs much quicker than typical installation methods—highly recommended for a DIY’er.
When planning your hand-rail, give a call to your local municipality to check the building codes in your area, which are very specific for stair construction. In the town where I live, the minimum height for a stair rail is 34 inches and the maximum height is 38 inches (measured from the top of the tread nose up to the top of the rail). The balusters must be spaced no more than 4 inches apart.
When planning for the stair rail, we found it helpful to make a diagram of the proposed rail design, complete with specific measurements, to make sure all the parts would assemble correctly on site.
And, of course, style is major concern. The overall design can incorporate a rail that mounts over the newel posts or terminates post-to-post against the sides. Will your balusters rest on open treads or mount onto a kneewall? Whereas our project used iron balusters, there is also the option of wood balusters that vary in shape, style and species. Newels vary in design from simple box designs to larger ornamental pieces with decorative trim. Handrails also vary in size and shape, and you want all the associated stair components to fit against each other in an attractive and proportional manner.
Stair rail construction is a complicated endeavor, so the best way to plan it is slowly and carefully, with attention to every site-specific detail that might affect its installation.
Rather than rehash L.J. Smith’s detailed installation manual, this article will focus on how we applied those instructions to this specific job. Be prepared for each stair project to differ somewhat regarding on-site challenges.
Remove the Old Rail
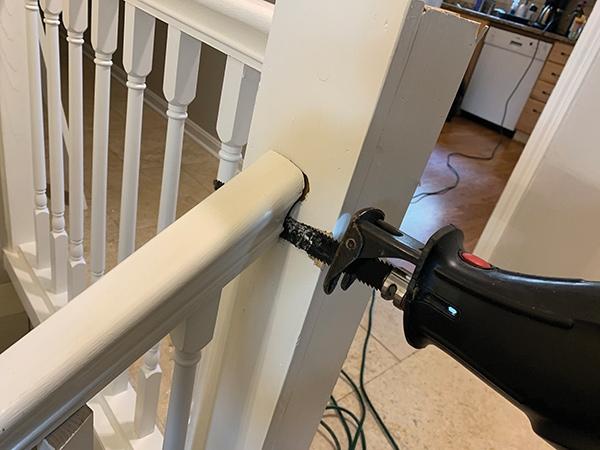
First step in handrail replacement is removal of the old system, which we took out when we replaced the treads. To do this, we used a recip saw to cut the handrail free against each newel. This enabled us to lift the handrail off the stair, and the balusters remained attached to its underside, enabling us to remove all of them at once.
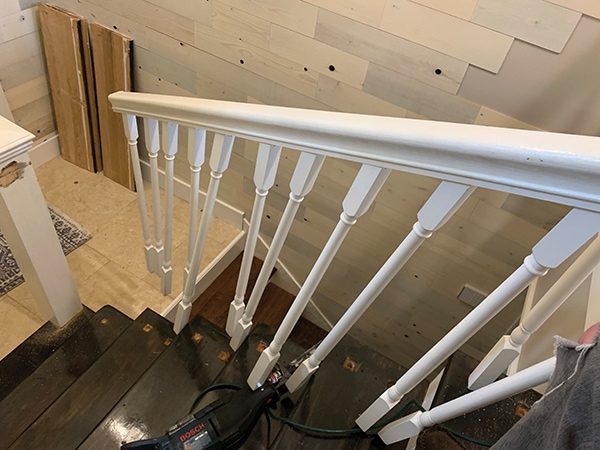
Next, the old newels were removed by prying the trim boards from around the 4x4s and cutting the posts flush with the floor.
Determine Newel Placement
As a general rule for an open-tread stair, the balustrade centerline between newels should be 1/2 of the baluster square inward from the face of the stringer. (On a kneewall stair, the balustrade should be centered on the kneewall.)
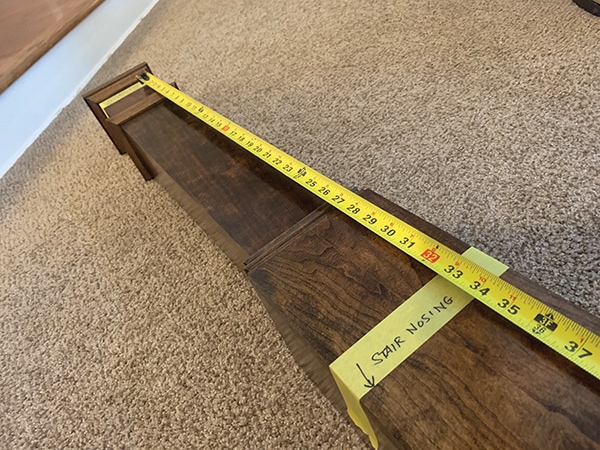
For our staircase, the location of the old newels determined placement of the new ones (to hide the old post stumps).

At the top of the staircase, the landing newel connects to a guardrail which terminates at a half-newel that is mounted to the wall. A half-newel is just what it sounds like—a matching newel post that is cut in half lengthwise at the factory to mount flush against a flat wall.
Read more : 5 Best Outdoor LED Strip Lights
Newel Installation
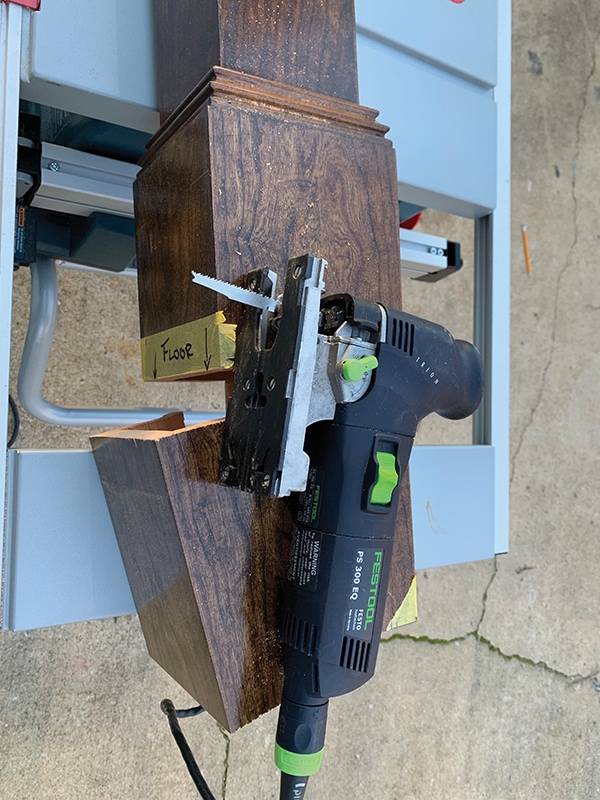
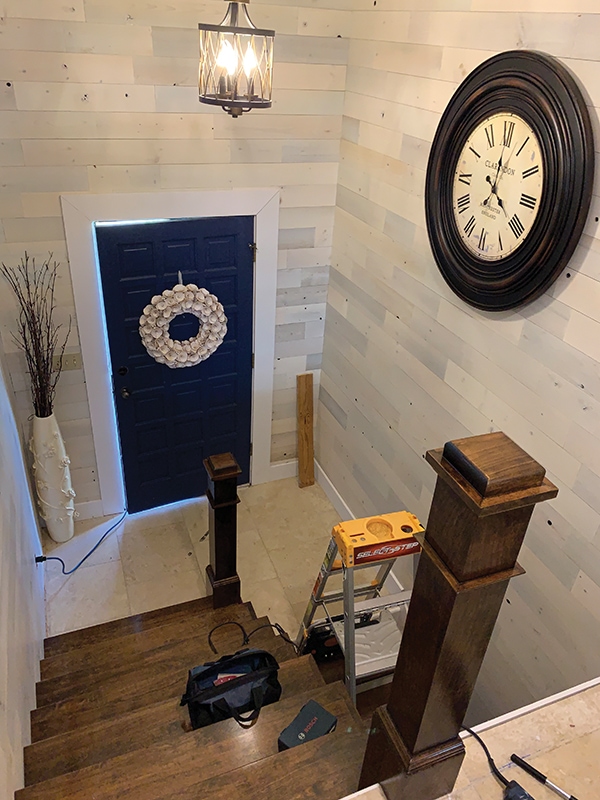
While the old newel locations worked fine for our stair design, they did require notching the newel bases to fit over the treads, which presented an extra hurdle during installation. For the upper newel (also called the “landing newel”), some dissimilar trimwork on each side of the post meant the notch had to be made deeper on one side of the newel than the other. Take careful measurements and be prepared for such inconveniences during your own installation.
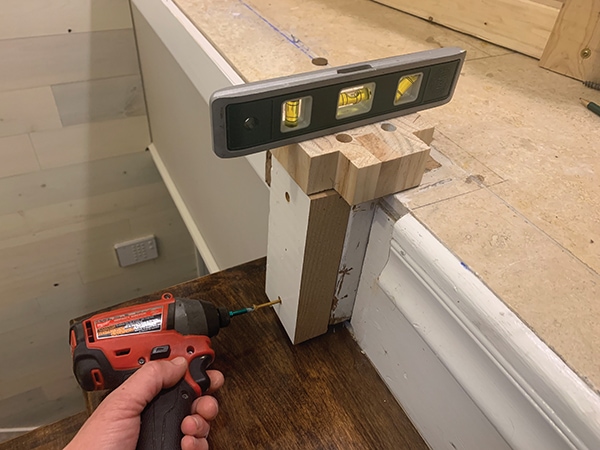
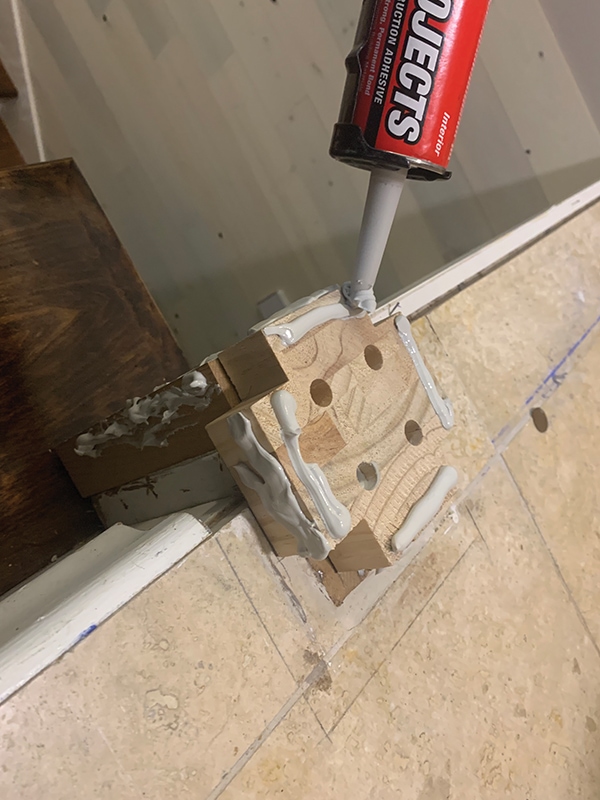
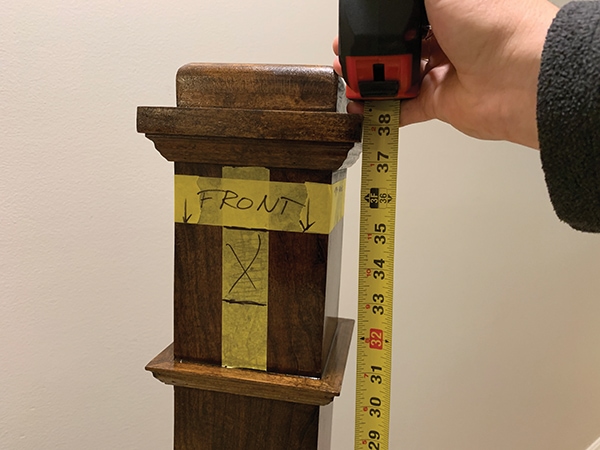
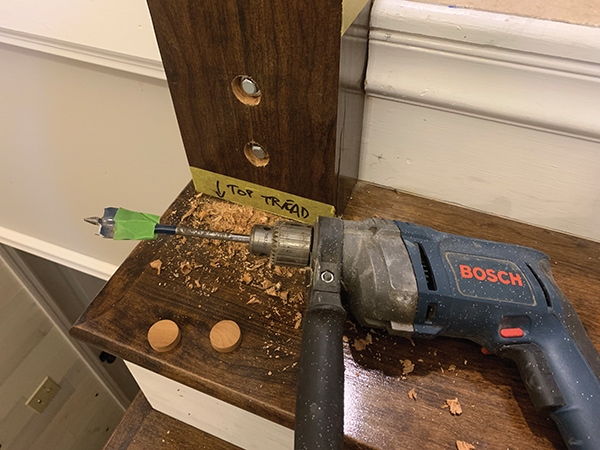
The newels from L.J. Smith are constructed from 1x solid cherry and built with a hollow center that fastens over a wooden mounting block. Before fastening in place, we dry-fit the newel, measured carefully, made necessary adjustments, then marked all the important rail-connection locations on the newel using painter’s tape. Marking the posts provides a handy visual guide for assembly and helps to organize the It’s gjob so you don’t forget any crucial steps or misalign the components.
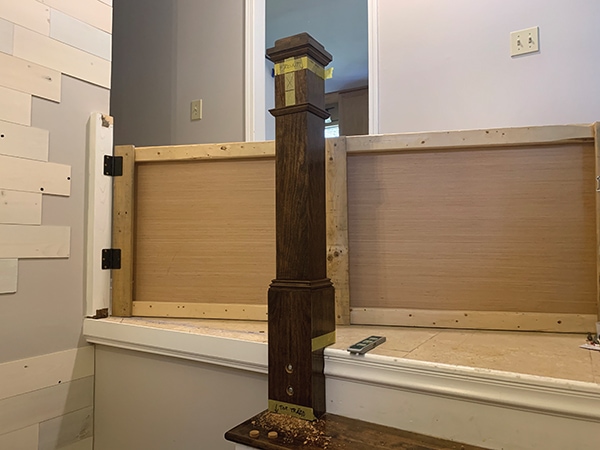
You’ll need to dry-fit both the starting newel and landing newel at the same time to ensure the handrail mounts against each newel at a matching elevation from the stairs.
When you’re satisfied with final placement of a newel, apply construction adhesive to the wooden mounting block and fasten it with four washer-head screws down into the floor framing. Fill any hollow voids at the newel base with solid blocking and nail or glue into place. For final assembly, apply adhesive at all points of contact between the mounting block, the filler blocking, and the interior of the newel. The newels are then anchored into the blocking or floor/stair framing using two 1/2-in. lag screws through the front of the base. For a belt-and-suspenders approach, drive finish nails through the sides of the newel into the blocking.
Determine Baluster Spacing
Before you ever order your stair parts, you’ll need to have determined the maximum baluster spacing and how many balusters are required per tread. The first baluster of each tread should be 1/2 baluster square back from the face of the riser. Divide the run of the tread (distance from riser to riser) by the required number of balusters per tread to find the center-to-center distance for the other balusters.
For example, if the run is 10 inches and the maximum spacing required by code is 4 inches; 10 divided by 4 equals 2-1/2 spaces required per tread. Round this up to 3 spaces. Thus, 3 balusters per tread are required. A 10-in. run divided by 3 balusters equals 3.333 in. (3-11/32 in.) center-to-center. It’s okay for the balusters to be spaced closer than 4 inches but not further apart.
When determining baluster placement, don’t forget to consider the shape of your newel posts. For example, the trim around the bottoms of our newel posts made them 1-1/2-in. wider than the tops of the posts—so we took measurements between the tops. If you forget this discrepancy, then a baluster spaced 4 inches away from the bottom of the newel might be spaced 4-3/4-in. away from the top of a newel, which would be a code violation.
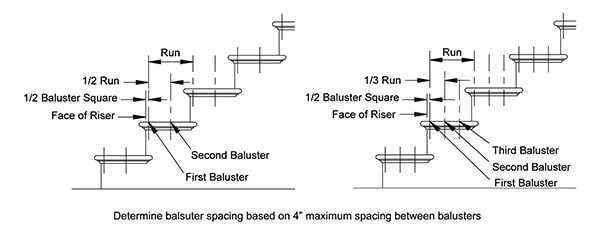
On the post-to-post staircase shown, the total run of the balustrade is the horizontal distance between the two opposing newel faces. We used the calculations above to determine the proper center-to-center baluster spacing for the total run, then marked these locations on the stair treads. We then turned our attention to the handrail, with plans to return to the balusters later.
Rail Installation
To determine the miter angles of the handrail, we placed a scrap 1×2 board atop the stair treads and clamped it alongside the newel posts, marking the intersecting angle with a pencil. The board was cut along the miters to serve as a template for the rail. We placed the 1×2 flush between the newels at the rail-connection points to double-check the fit of the miter angles. (If the newels have any trim attached, make sure the rail will not interfere with the trim at either post.) Make any necessary adjustments to the angles and elevation, and ensure the final position achieves a consistent rail height above all the treads. Remember to account for the thickness of the handrail, in case your rail differs in size from your template board.
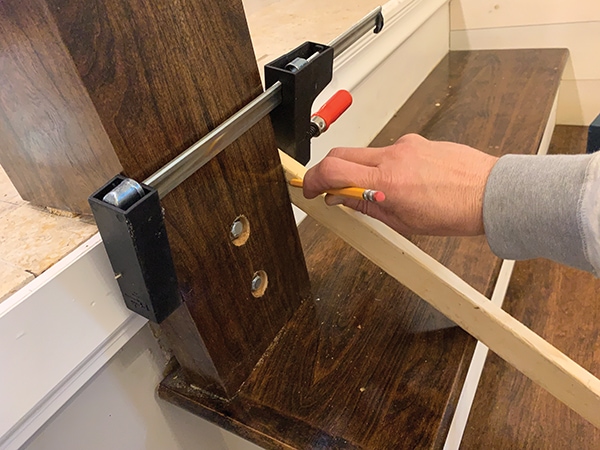
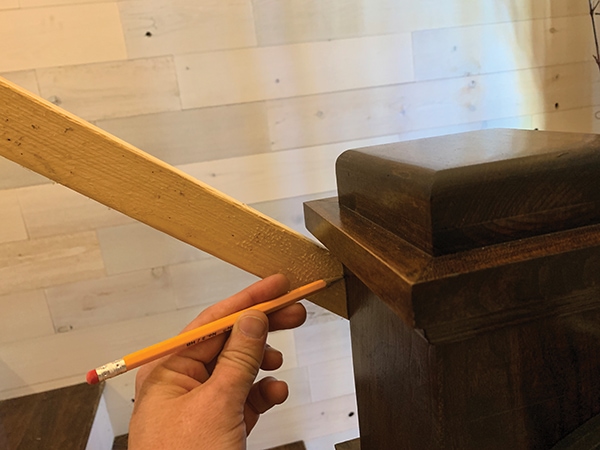
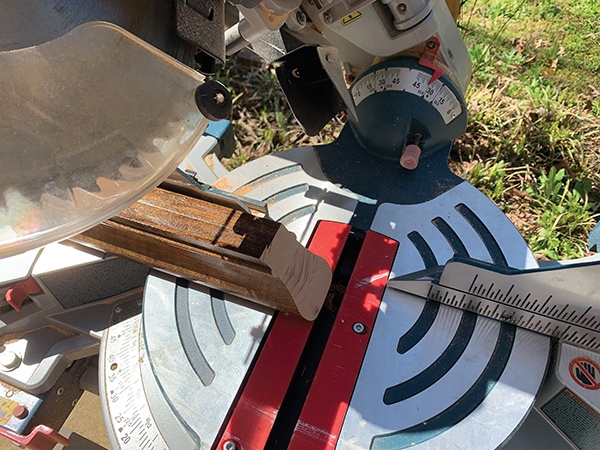
Once you’re satisfied with the angles and position of the 1×2 template, transfer the measurements to the handrail and make the cuts on a miter saw. There is a definite top and bottom side to handrail, so don’t mix them up.
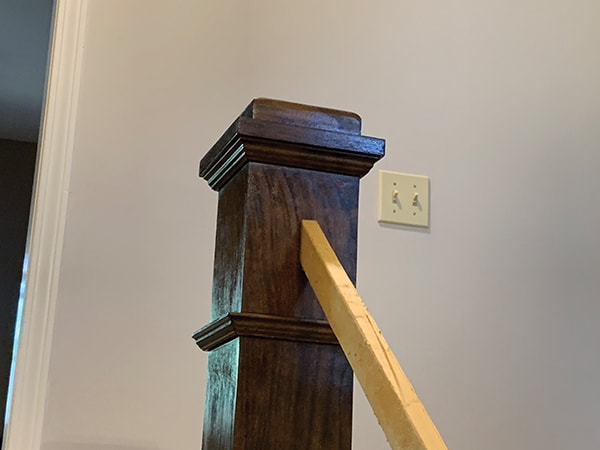
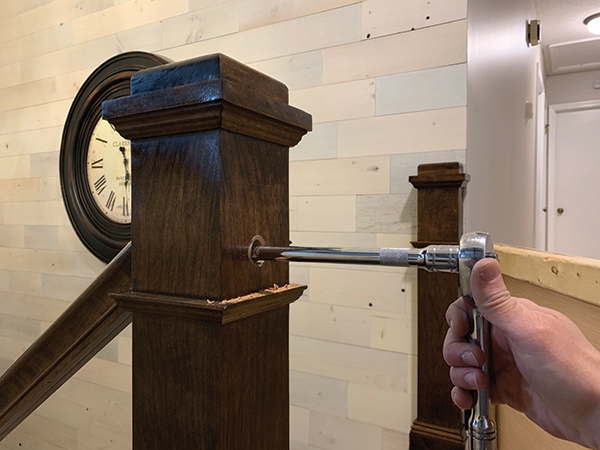
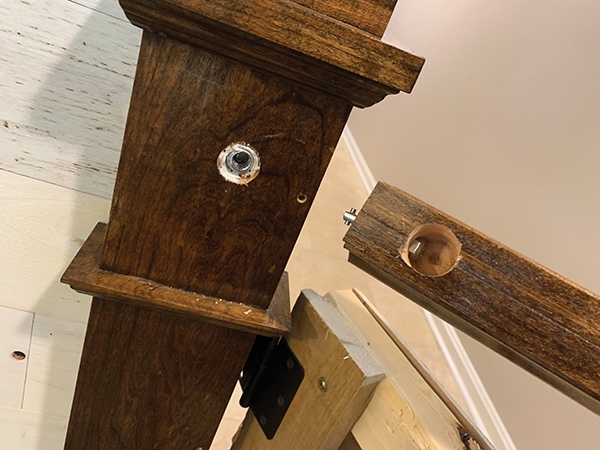
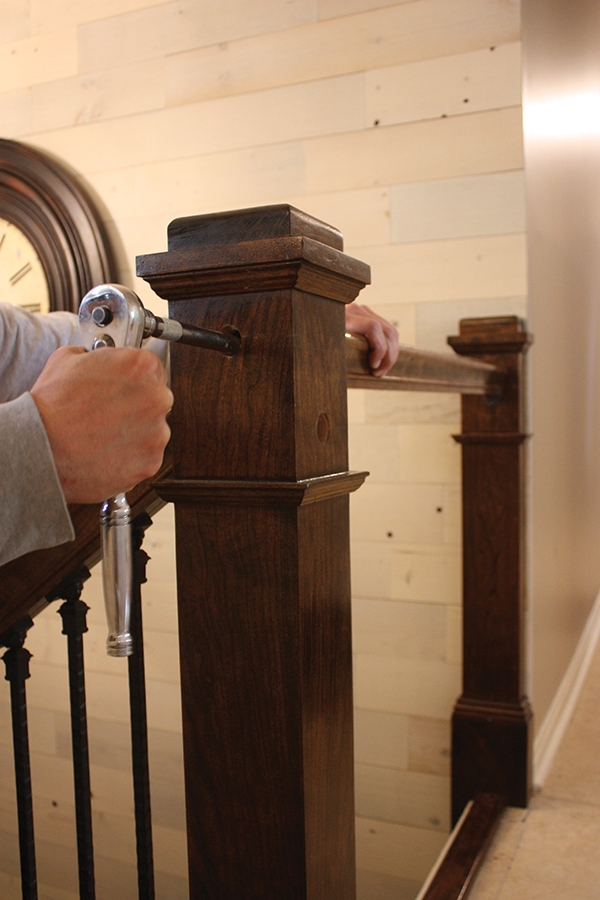
The rails mount to the newels by drilling an access hole through the newel for a lag screw. The lag screw (with washer) is inserted through the newel and exits through a second smaller hole on the opposite side where it threads into a predrilled pilot hole on the end of the rail. Use a socket with an extension to tighten the lag screw. The newel holes are covered with matching wood plugs.
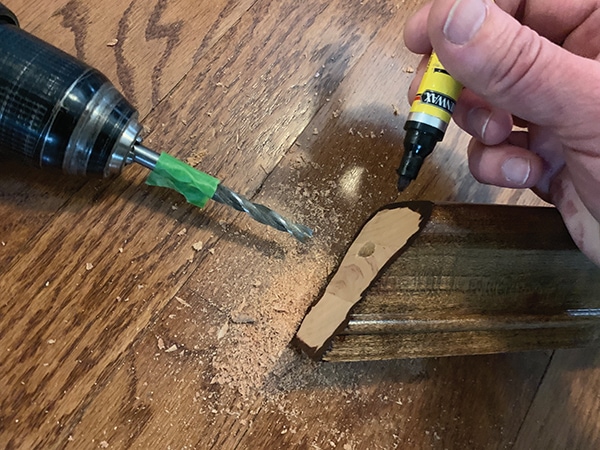
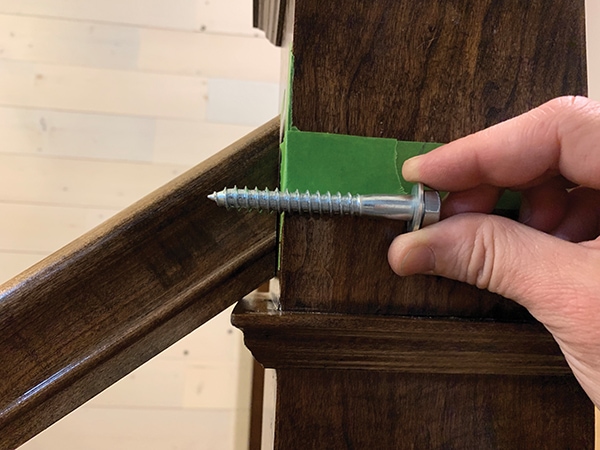
Pro Tip: Always visually inspect the clearances of your mounting hardware before driving screws in place. Before fastening, I realized the lag screws I had ordered were too long. If I had driven them in without discovering this, I’d have blown the screw tip out the top of the handrail. To prevent overdriving, I added extra washers beneath the head of the lag screw.
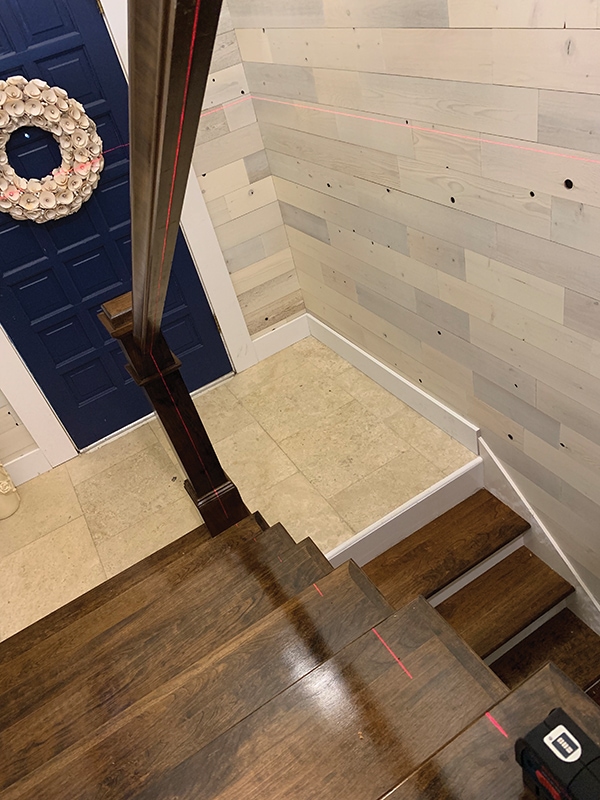
Tool Tip: Lasers can make life easier. When positioning the handrail, I used the Bosch GLL2-40 crossbeam laser to project a laser line the along the baluster locations marks. The plumb laser line extended up to the underside of the handrail, providing a visual indication of where the balusters should intersect the rail. The laser line helped us guide any minor adjustments to the rail position, ensuring consistent alignment in all directions.
Installing the Balusters
Read more : The 8 Best Outdoor Sprays for Spiders & How to Use Them
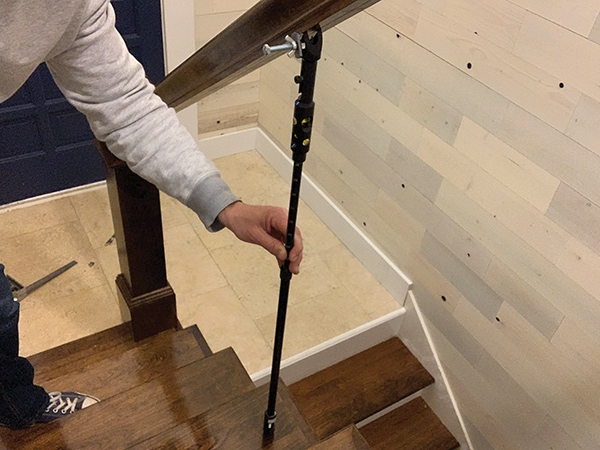
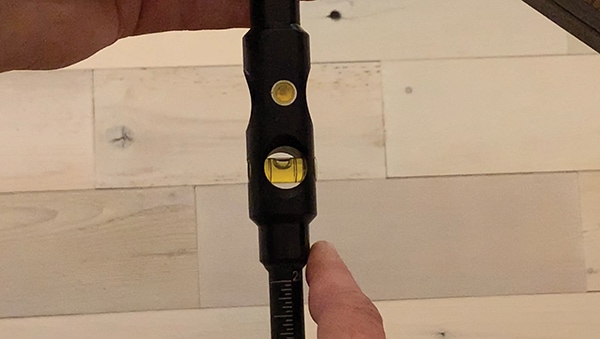
Attention DIY’ers—when it comes to plumbing the balusters along a sloped handrail, L.J. Smith offers a handy tool called the Telescoping Baluster Marking Tool. It’s equipped with a bubble level, rule and a 1/2×5/8-in. extension which extends from 28 to 42. To use, place the tool’s bottom pin in the marked baluster location on the tread. Extend the telescoping shaft up to the underside of the rail, center it beneath the rail, then plumb the tool using the bubble vial. When satisfied with placement, pull down the spring-loaded head and release. A nail punch will drive into the handrail and create a divot for fastening the baluster. Repeat for each baluster as an easy way to mark placement and ensure plumb.
As mentioned earlier, when it came to installing the balusters I “cheated” by using L.J. Smith’s IronPro System—and I’m glad I did. The IronPro system allows you to screw on adjustable, pivoting collars at the top and bottom of the baluster locations to house the iron balusters. The adjustable nature of the system reduces the likelihood of placement error and makes fitting the balusters much faster and easier than traditional countersunk installation methods.
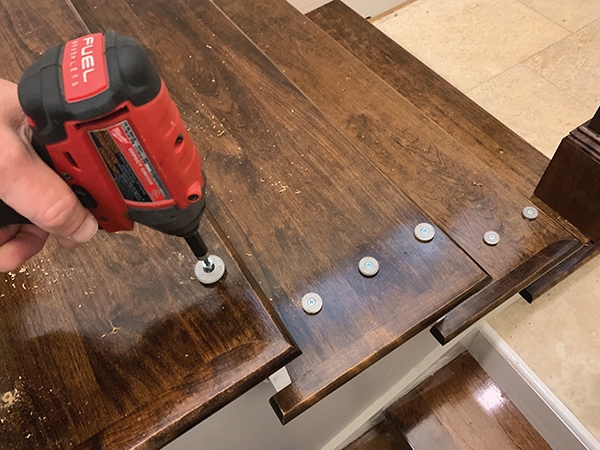
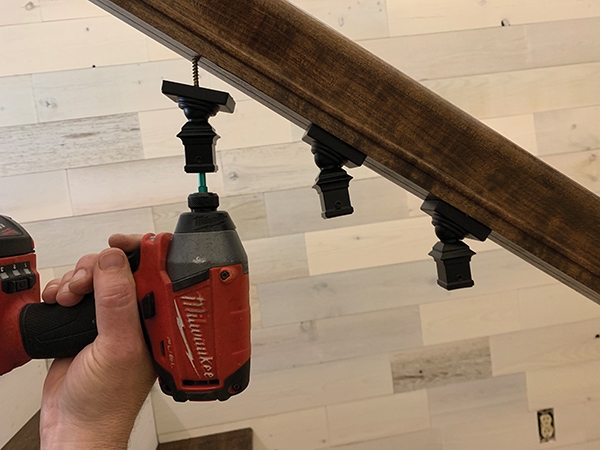
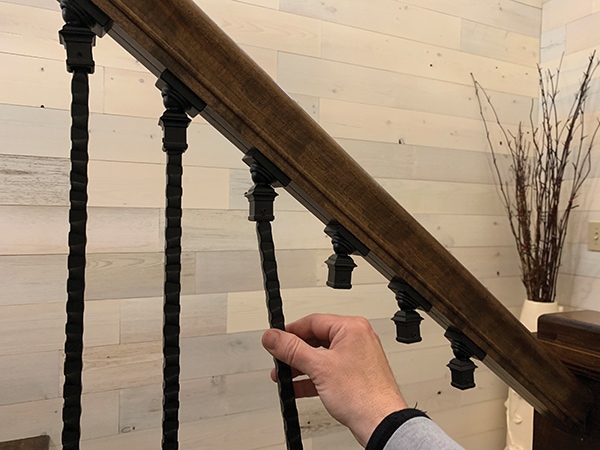
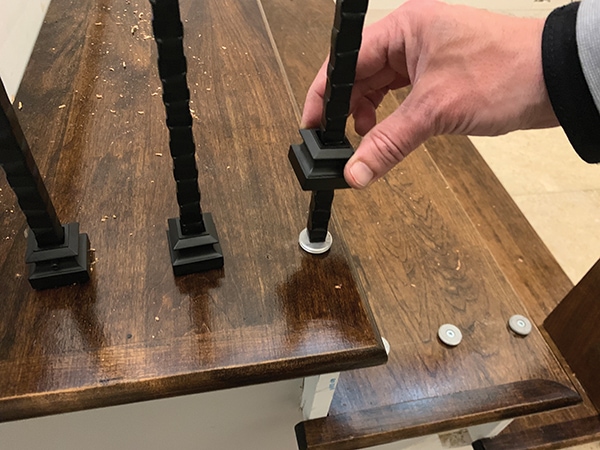
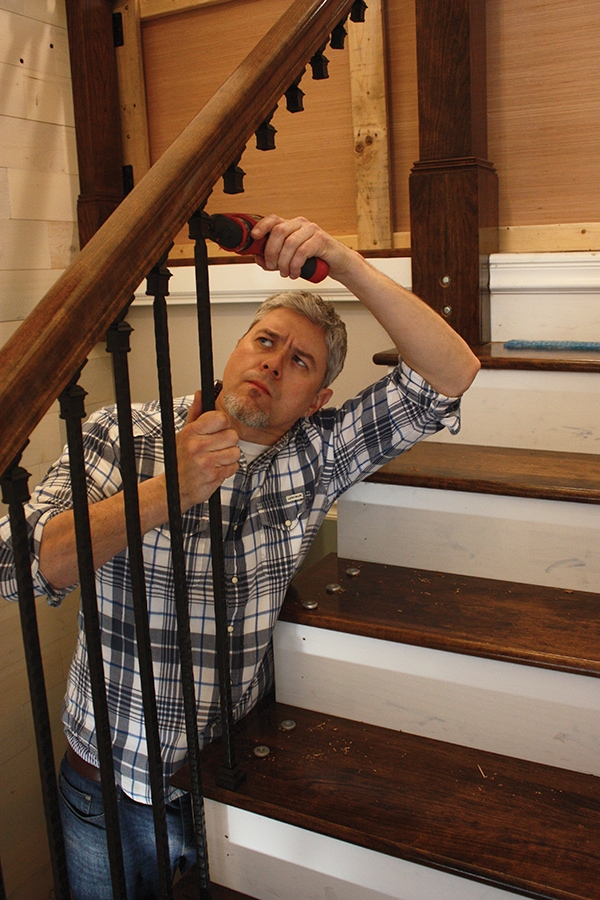
To use the IronPro System, first screw down the threaded metal discs at each baluster location. Next, screw the pivoting ball adaptor to the baluster’s corresponding location beneath the rail. Cut the metal baluster to length on a chop saw. Slide the base collar over the baluster shaft, and insert the upper tip of the baluster into the ball adaptor. Tilt the baluster down over the mounting plate, slide the base collar down over the threaded disc, then screw it firmly in place. Tighten a couple of set screws, and baluster installation is complete.
Repeat for all balusters.
Victory Lap
That’s the basics of this stair-rail project. We installed the guard-rail at the upper landing against the half newel using L.J. Smith’s Flush Mount Hardware, which conceals the fastener. The upper landing also got a lower shoe rail to conceal an unsightly floor/trim transition along the edge. We also installed a secondary rail along the lower stair flight using wall-mount brackets.
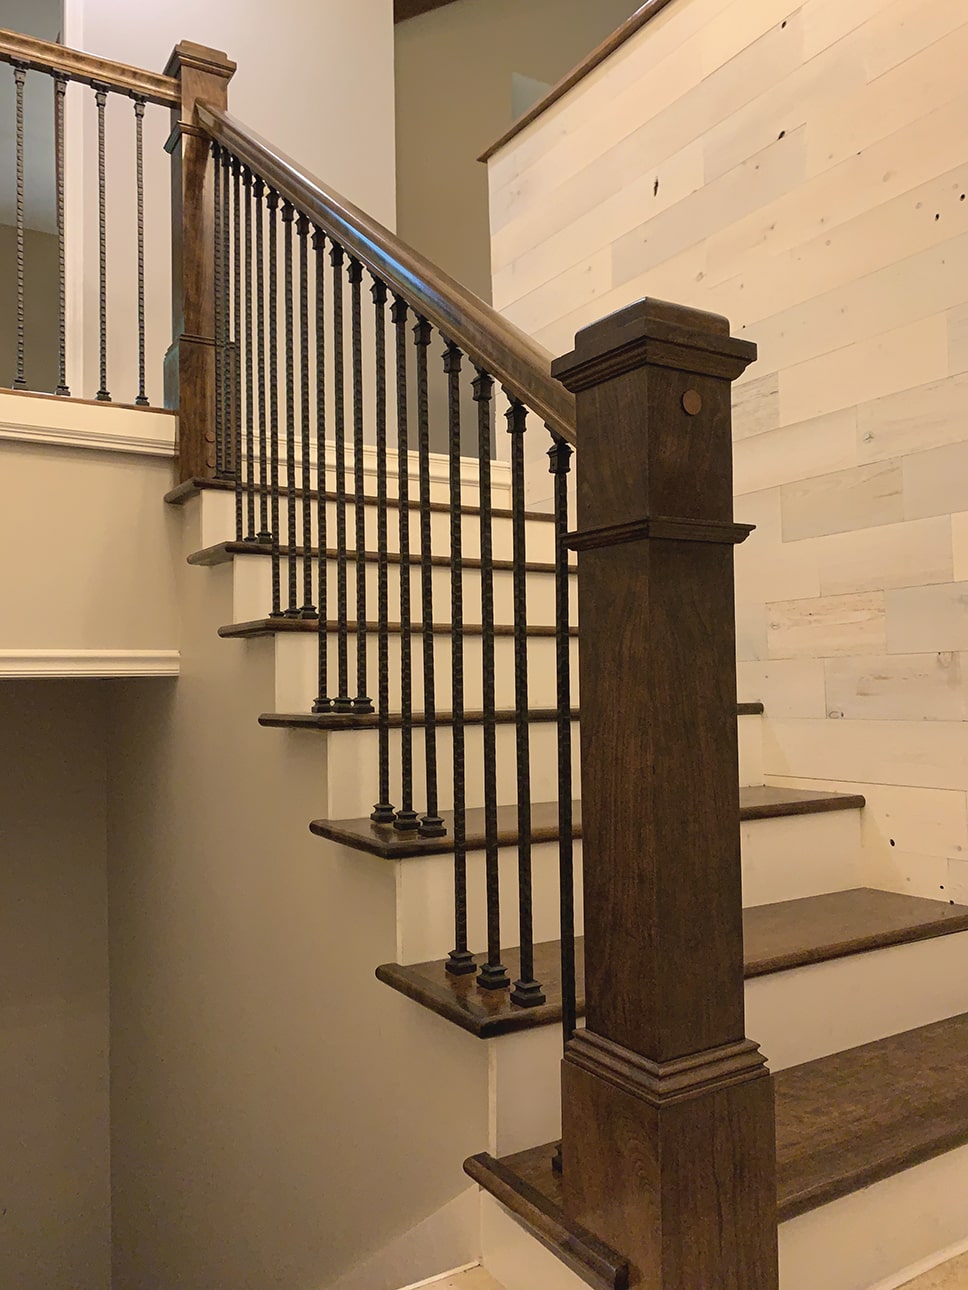
After the rail system is installed, you should expect a lot of touchup work, such as adding wood plugs, filling nail holes with putty, caulking joints, etc. But all the time, work and attention to detail will be worth it, once you show off your new stair rail installation to friends and neighbors.
For more information on L.J. Smith Stair Systems, visit www.ljsmith.com.
Side Note
Safety Gate
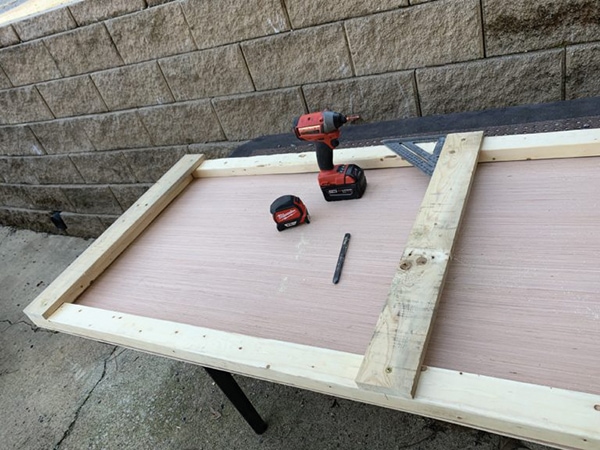
I have three young kids, and by removing the guardrail from the upper stair landing, I created a major safety hazard during this remodel. My solution was to fashion a simple wood gate that closed off the entire landing during construction.
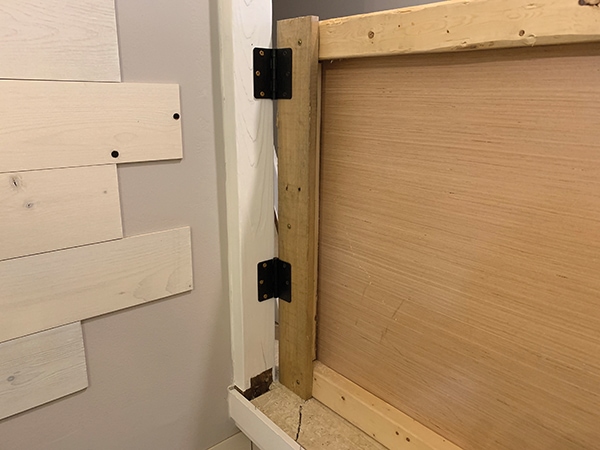
I threw this thing together using a sheet of luaun plus some scrap 1×3 boards and 1×4 leftover from a disassembled shipping pallet. The connections are all made with pan-head screws.
I mounted hinges on one end of the gate and screwed them to the wall.
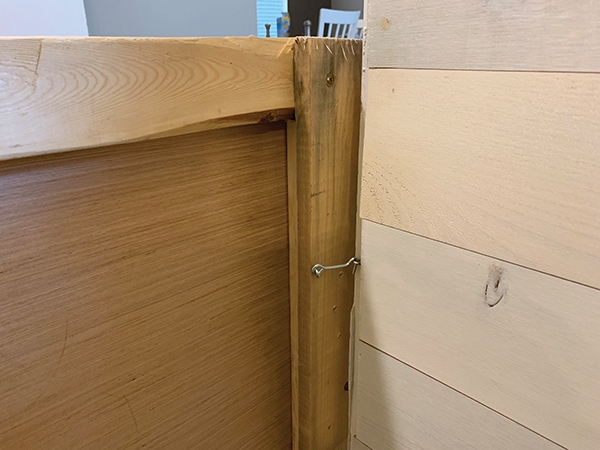
The other end of the gate gets a hook-and-eye latch, which I located low enough on the stair side that my two youngest kids couldn’t reach it.
Here’s the temporary gate in place atop the stair landing.
Source: https://gardencourte.com
Categories: Outdoor


