Cooking with cast iron is a timeless tradition that has been passed down for generations. It is definitely our favorite method of stovetop cooking.
With its durability, versatility, and ability to retain heat, cast iron has become a staple in many kitchens around the world, including ours, and yours if you are reading this!
You are watching: How To Season Cast Iron with Beeswax (BEST Method)
Whether you’re using a cast iron skillet on the stovetop, in the oven, or over an open flame, this cooking material provides a unique experience that is hard to beat.
Not only does cast iron provide consistent, even heat, but it also leaves a rich, natural flavor to your dishes.
In this article, we’ll explore the benefits of cooking with cast iron, and then how to properly care for your cast iron cookware. So, if you’re looking to get healthy and keep your cast iron in top shape for years to come, we’ve got you covered.
The Benefits Of Using Cast Iron
Cooking with cast iron offers numerous benefits that make it a popular choice among home cooks and professional chefs alike.
There are so many great benefits as well, and we will share them below and tell you why we made the switch so many years ago!
The benefits of cooking with cast iron are:
- it is incredibly durable and can last for many years with proper care
- it has excellent heat retention, which means that it heats evenly and maintains a consistent temperature, making it ideal for recipes that require a long heating process or for evenly searing meats
- the pan develops a natural non-stick surface over time, reducing the need for added oils and butters, making for healthier cooking
and here are our own personal reasons why we switched to cast iron cookware:
- using cast iron has the added benefit of adding iron naturally to your diet, which can be especially beneficial for individuals who are iron-deficient (which I was when we decided to switch)
- we wanted to get away from the health risks involving a non stick pan like Teflon
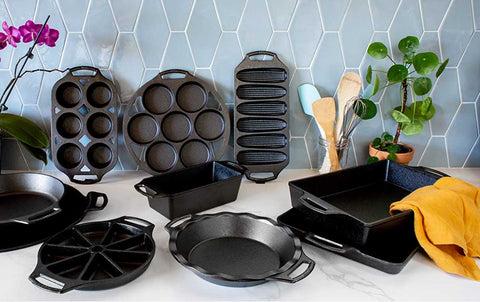
Shop for cast iron bakeware from the best cast iron company here!
Are Non Stick Pans, like Teflon, Dangerous?
As I mentioned above, switching to cast iron pans was a personal choice for us and one of the reasons was due to the dangers of these pans.
Here’s a bit about non stick pans
Non sticking pans are coated with a fluorinated plastic, or PTFE. There have been numerous studies about whether or not nonstick cookware was safe to use, and according to the American Cancer Society, it is the perfluorooctanoic acid (PFOA) and perfluorooctane sulfonate (PFOS) that you need to watch out for. PFOA and PFOS are part of a large group of lab-made chemicals known as perfluoroalkyl and polyfluoroalkyl substances (PFAS).
Here is where it gets interesting: PFOA (what you need to watch out for, you can read about the studies where it increases the risk of certain tumors here) was used to make PTFE (ie: non-stick cookware surfaces) until 2013, when it was removed from the Teflon manufacturing process, and other manufacturer’s of nonstick cookware also stopped using PFOA.
HEALTH CONCERNS – According to the American Cancer Society:
PFAS have the potential to be a health concern because they don’t break down easily and can stay in the environment and in the human body for a long time. Studies have found them worldwide at very low levels in just about everyone’s blood. Higher blood levels have been found in communities where local water supplies have been contaminated by PFAS. People exposed to PFAS in the workplace can have levels many times higher.
NO LONGER USED – This is from the United States Environmental Protection Agency:
PFOA is no longer used in United States to manufacture fluoropolymers but some fluoropolymers containing PFOA are imported as part of articles. Fluoropolymers impart valuable properties, including fire resistance and oil, stain, grease, and water repellency to articles, and are used in many industry segments, including the aerospace, automotive, building/construction, chemical processing, electronics, semiconductors, and textile industries.
Summary: Are Nonstick (ie: Teflon) Cooking Surfaces Dangerous?
So, to summarize that mouthful, nonstick pans are coated with PTFE. PFOA, the dangerous stuff, was used to make PTFE until they stopped (in the United States) due to health risks such as tumor growth.
So if you are using older nonstick pans, or you are not sure what country they are from, it might be time for you to switch to cooking on cast iron as well.
Cast Iron Cookware
I have a feeling I’m preaching to the choir here, you are here because you wanted to find the best seasoning for your cast iron skillet or pan.
Well, it’s always good to be reminded you made a fantastic choice in using this material to cook your food on.
Shop cast iron best sellers hereWe love using our cast iron skillet and pans, especially with delicious food from our garden. Here are some beet tops we sautéed in our seasons pan last summer!
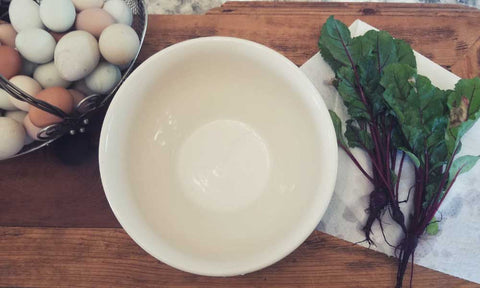
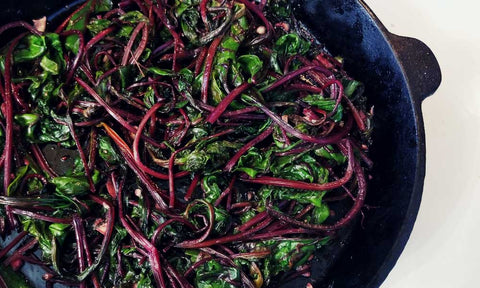
We have a really amazing recipe for seasoning your cast iron skillet that is easy to make.
This seasoning recipe won’t deteriorate your surface at all, and it won’t go rancid like animal some unsaturated oils would.
Let’s get into it.
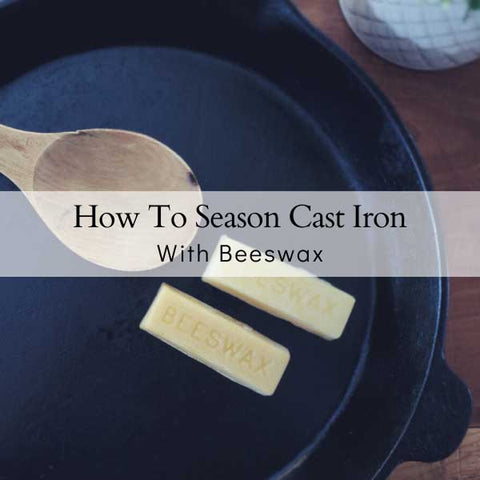
Seasoning involves coating the cast iron skillet or pan with a thin layer of an oil/wax and baking it in the oven or on the stovetop to create a natural non-stick surface.
This layer of oil/wax not only prevents food from sticking to the pan but also helps to protect the iron from rust and corrosion.
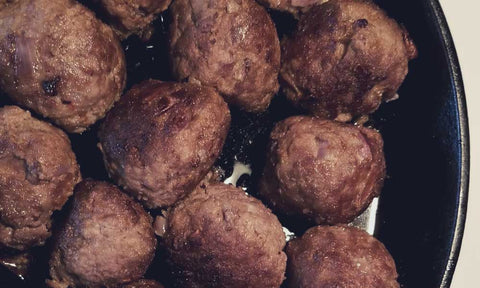
Here are some meatballs we cooked in our seasoned cast iron pan (they brown so beautifully when cooked this way!):
Read more : Essential Oils Against Dandruff: The Top Five!
Furthermore, seasoning helps to build up a protective layer on the iron, which makes it more durable and long-lasting, as long as you choose oils that will not go rancid.
What Is Rancidity?
Rancidity is the natural spoilage of fats or oils due to changes in the chemical structure of the fat. As you are heating the oils past their smoke point, you are changing their chemical structure. Some oils can handle that, and others can’t.
The oils that can handle it become polymerized through heat.
Polymerization of Oils On Your Pan
According to Lodge, “when oils or fats are heated in cast iron at a high enough temperature, they change from a wet liquid into a slick, hardened surface through a process called polymerization.
This reaction creates a layer of seasoning that is molecularly bonded to the iron. Without this layer of carbonized oil, iron cookware would corrode and rust due to the oxygen and moisture in the air.
On a microscopic level, cast iron has a jagged, uneven surface. This texture provides more surface area for the seasoning to bond and adhere to the iron. As the layers build up, the oils and fats will fill in the texture, creating a smooth, naturally nonstick cooking surface […]”.
In short, seasoning your cast iron skillet or pan is essential for keeping it in good condition and ensuring that it performs well for many years to come.
Which Fats Will Go Rancid?
According to Natural Products Insider, “unsaturated fats are more susceptible to oxidation than are saturated fats, meaning the more polyunsaturated a fat is, the faster it will go rancid.
This is due to the more unstable double bonds, which allow more oxygen to react at those points. […] Many materials can undergo an oxidation process that results in the generation of heat, which eventually reaches auto-ignition temperature.”
Unsaturated Fats
Here are some examples of unsaturated fats which you would not want to use in a seasoning
- vegetable oil
- olive oil
- peanut oil
- canola oil
- sunflower oil
- rapeseed oil
- flaxseed oil
- corn oil
Saturated Fats
And, on the other end of the spectrum, here are some of the more saturated fats that would be good to use in seasoning (from the highest down, see the full list from food data):
- organic, virgin coconut oil
- palm kernel oil
- cocoa butter
- palm oil
Beeswax, according to a paper by y Paul M. Kuznesof, Ph.D from the Food and Agricultural Organization of the United Nations:
Beeswax (INS No. 901) consists primarily of a mixture of esters of fatty acids and fatty alcohols, paraffinic hydrocarbons, and free fatty acids; minor amounts of free fatty alcohols are also present.
Adding a wax to your fat for making a cast iron skillet seasoning recipe helps seal in your oils and conditions your cast iron. There are products out there that are made actually made for this purpose!
What about grapeseed oil?
Yes, we know how popular grapeseed oil is to season cast iron. But in terms of saturated fat, coconut oil has 11.2g of saturated fat per tablespoon where grapeseed oil only has 1.3g of saturated fat per tablespoon (source).
Go ahead and use your grapeseed oil though, or better yet, try both. Let us know your preference in the comments at the bottom of this article!
Our favorite method to season a cast iron skillet or pan is with beeswax and coconut oil.
Seasoning A Cast Iron Skillet or Pan With Beeswax
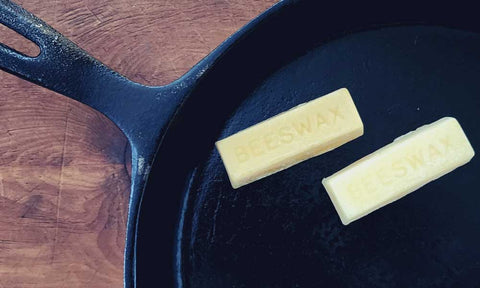 Seasoning cast iron cookware with beeswax is a traditional method that provides several benefits over oil-based seasoning.
Beeswax is a natural and non-toxic alternative to oil, and it creates a hard, smooth, and non-stick surface on the iron.
Unlike some unsaturated oils (like vegetable oil) which can break down and become rancid over time, beeswax remains stable and does not require regular reapplication, unless it is scrubbed extremely hard with detergents and dish soaps (which we don’t recommend unless necessary).
When beeswax is mixed with a saturated fat, you get a great recipe for a cast iron skillet seasoning.
Why Is Beeswax Best For The Seasoning Process?
Beeswax is naturally heat-resistant, which means that it can withstand high temperatures without breaking down, making it an excellent choice for high-heat cooking.
It is also a natural, eco-friendly wax that is edible, making it a safe option to use on a cooking surface.
Here are the best ways to use beeswax naturally around your home!
Here’s where natural beeswax comes from: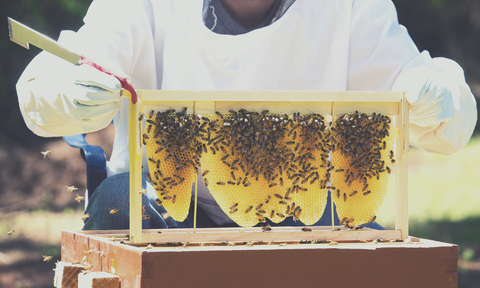
Furthermore, beeswax is hydrophobic, meaning that it repels water which makes it easier to clean and care for your cast iron skillet or pan.
It is especially hardy against soap; more so than other oils, if you do ever need to wash with soap for some reason.
Beeswax is also a seasoning that will NOT leave a sticky residue on your pan like you might get with a vegetable oil or other cooking oil.
Overall, seasoning your pan with beeswax is a simple and effective way to enhance its performance and ensure that it lasts for many years to come.
Beeswax Cast Iron Seasoning Recipe
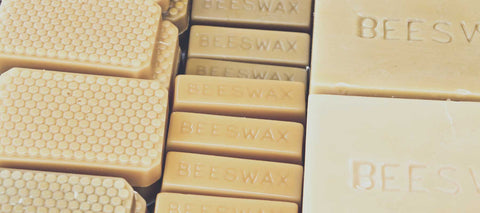
Beeswax Cast Iron Seasoning Ingredients
- 20g Real, 100% pure beeswax that is not bleached or mixed with other waxes.
- 80g organic, virgin coconut oil
- A cloth or paper towel to apply
PRO TIP: We really don’t measure our beeswax and coconut oil, we just know to have about 4 times as much coconut oil than beeswax. AKA we eyeball it. Also, you want to make sure you don’t use too much oil.
*We recommend the above-listed beeswax for making a patina or your cast iron seasoning, but you can see all of the other beeswax resources we recommend, these are all direct-from-the-beekeeper sources:
READ: Where To Buy Beeswax Directly From the Beekeepers (This is the real stuff).
Purchasing Real Beeswax
We recommend purchasing your beeswax in a block, right from a trusted beekeeper (again, see our resource if you don’t have a beekeeper near you) and melting it down with coconut oil your into beeswax molds so you can take a puck out to easily season your pan when it is hot. You may have to keep these in a ziplock in the fridge if they are too soft to keep out.
Read more : Easy Cloud Dough Recipe
You can alternatively grate your beeswax and melt in a double boiler or grab yourself a wax melter which works beautifully.
This is a great beeswax mold to make cast iron seasoning pucks from beeswax. (We especially like that these are round making it easy to go around all of the interior edges of your pan or Dutch oven).
Check price of a wax melter we recommend for beeswax here
Beeswax Cast Iron Seasoning Directions:
Here’s how to season a cast iron pan with beeswax and coconut oil:
- Clean the pan: Start by washing the pan with hot, soapy water and dry it thoroughly. You can put it on the stovetop for a minute or so to really dry it out.
- Melt the beeswax and coconut oil: Place your beeswax and coconut oil in a double boiler or in a heat-safe bowl set over a saucepan of simmering water. Melt the until it is all liquid. If you have pre-made beeswax/coconut oil pucks, you can heat the pan and use the pucks on the inside of it, rubbing the excess away carefully with a cloth or paper tower.
- Apply the beeswax/coconut oil: Using a clean cloth, brush or paper towel, apply a thin layer of melted material to the entire pan. Make sure to cover the entire inside of the pan. Also make sure there is no excess oil sitting anywhere in a puddle; you want a solid layer, not a pool.
- Bake the pan: Place the pan in a preheated oven set to a relatively low heat 350°F (175°C) and bake for 30 minutes – one hour. Then, end the heating process by turning off the oven and letting the pan cool completely for several hours, or overnight, then carefully remove it.
- Repeat the process (optional): Repeat this process two to three times on your cast iron to build up a protective and non-stick layer.
- Store the pan: Once the seasoning is complete, store the cast iron skillet or pan in a dry place, and it is ready to use. Re-season your cast iron if rust appears after many uses, although, this is unlikely if you are taking proper care of your cookware.
*You can do this protective coating on a new cast iron skillet or pan as a pre-seasoning if you would like to protect it immediately.
This method works effectively on all cast iron and will keep the water away from your surface, in turn, preventing rust from appearing, as that is what causes the damage.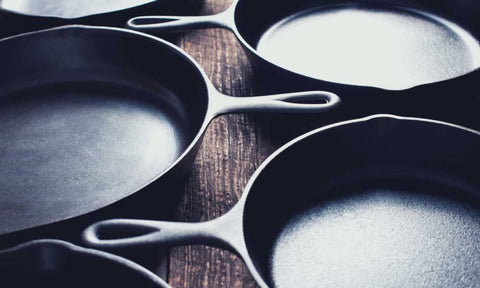
By following these steps, you can season a cast iron skillet or any iron cookware in the oven with beeswax and coconut oil and enjoy its many benefits, including a natural non-stick surface, improved heat retention, cookware protection and enhanced flavor.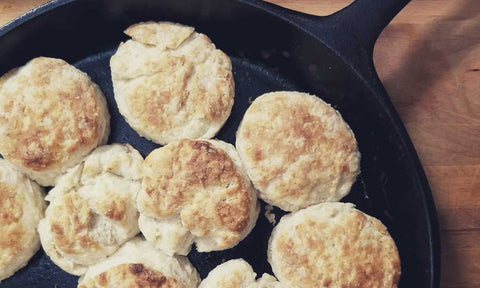
Cleaning Seasoned Cast Iron
To clean the food particles from your seasoned cast iron skillet or cast iron pan, simply gently scrub it in the sink with water. Don’t let it sit in water; scrub it with paper towels or a cloth under the running tap.
You can either dry your seasoned cast iron pan with a tea towel or put it on the stove top for a minute with the heat on so any water evaporates. Set a timer so you don’t forget.
If you properly season cast iron, the water will only wash away what’s left on your cookware. Dish soap will disintegrate your seasoning faster, so we don’t recommend washing with dish soap unless necessary. If you do though, you can either re-season or keep an eye on it for when it needs a new seasoning.
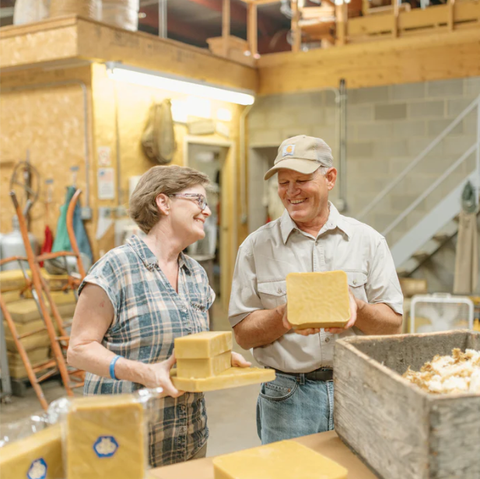
This is a photo of where we get our beeswax from when we don’t have enough from our small backyard apiary. This is a real beekeeping family business in North Dakota and they have been beekeeping in the family since the 1920’s!
We highly recommend their beeswax.
In sum…
- Cast iron needs to be seasoned (oil baked) to make it a surface you can slide your foods around on and it keeps your cast iron in top shape (preventing rust)
- As soon as you get a new pan, (new pan from the store or new to you), you should make sure it is well seasoned, and you can follow our easy steps above in regards to the oiling and heating process.
- Unsaturated fats (oils like vegetable oil, olive oil, corn oil) can go rancid over time
- Saturated fats are the ones you want to use on your cast iron
- Blending your saturated fat with a wax like beeswax makes a perfect cast iron seasoning
- A well seasoned skillet will act just like a nonstick surface.
- Do not clean your cast iron with soap or steel wool. Instead, use warm or hot water and a cloth or nylon brush to get it clean.
- If you need to clean it with a soap, do so gently and try not to remove too many layers of seasoning. You may need to re-season.
- If you keep your pan well seasoned and in good condition, it lasts forever.
Wondering what else you can use beeswax for?
READ: The BEST Uses For Beeswax
Here’s How To Make Natural Beeswax Lip Balm
How To Make Beeswax Wraps
How To Use Beeswax As Furniture Polish
How To Make Beeswax Candles
Here are some other resources you may be interested in:
Gift Ideas For Beekeepers
Where To Buy Real Beeswax
Shop for the BEST USA-made cast iron cookware HERE
Beekeeping Equipment List | How To Start
Gift Ideas For Gardeners
Shop for beeswax wraps here
Did you like this article?
❤️ Here’s how you can support our blog:
My name is Linnea and I am a backyard gardening enthusiast! Along with my husband and our two kids (and chickens, ducks, bees and our little dog). Our hobby – growing our own food and making our meals from scratch. My blog, The Farmers Cupboard, is the website that blossomed from that passion. I love every second I spend sharing our hobby with like minded backyard growers.
It’s easy to support my blog, and it is so appreciated. Please SHARE an article somewhere, pin a photo to your Pinterest board, follow on any of our social medias or sign up for our newsletter! That’s it!
These little things help our blog grow and allow us to continue doing what we love: growing good food and sharing what we learn.
PINTEREST PASSIONATE? We’re opening up our cupboard to you!
Click on the pin below made just for you. It will bring you right to my little Pinterest community, where I would love for you to FOLLOW The Farmers Cupboard and see all of our gardening and backyard dream ideas!
Let’s grow good things together!
Source: https://gardencourte.com
Categories: Recipe

