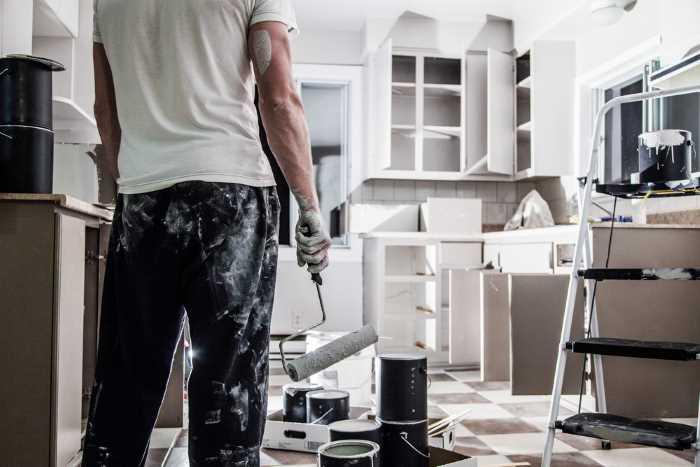
If you want to give your kitchen a makeover, then keep it simple and paint the kitchen cabinets — using chalk paint. It’s easy to apply and the surfaces won’t need much preparation, because chalk paint can adhere to just about anything.
You’ve probably heard from numerous friends what a nightmare trying to paint your kitchen cabinets can be. However, this isn’t always the case. And if you are looking to update the look of your kitchen, it is the easiest place to start with. And you can definitely DIY with process with a little time and patience. Remember, we said it would be easy, we didn’t say it wouldn’t be time consuming.
You are watching: Chalk Painting Your Kitchen Cabinets: A Quick and Easy Guide
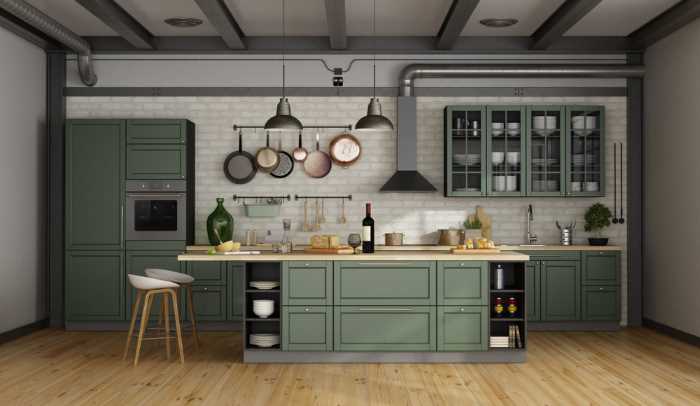
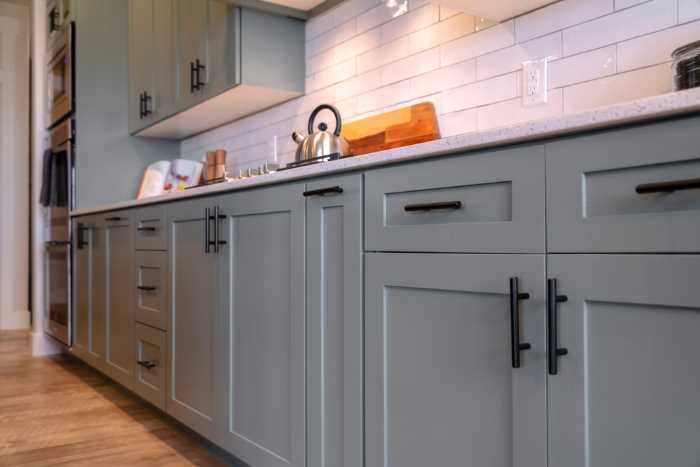
Chalk painting your kitchen cabinets will create a new look affordably, and relatively quickly. Read on to make this makeover in your home a reality.

Understanding chalk paint
Chalk paint is, quite simply, a special paint that has a chalky appearance when it has been painted on a surface. The original chalk paint was created by the Annie Sloan paint company, but there is a range of similar products available from many paint companies.
Chalk paint is a matte paint with a chalky finish and is very popular for creating an aged look on furniture, because it can be distressed easily, which gives the surface a shabby-chic look.
Pros and Cons of Using Chalk Paint in the Kitchen
Of course, when you consider creating chalk paint kitchen cabinets, you need to consider the possible disadvantages as well as the advantages.
Pros
Chalk paint is quite a cost-affordable paint and can be applied quickly, which means you can transform your kitchen in a limited time and get back to using it.
Painting with chalk paint means giving your kitchen cabinets a whole new look in a timely manner, because it spreads thickly and dries relatively fast.
Using a wax sealant gives the cabinets a smooth, quite durable finish. Cabinets that are waxed will be protected from bumps and bashes for some time. In a kitchen, this is likely to happen, even if its only a pot that is put into a cupboard clumsily.
Preparing a surface to be painted with chalk paint is not as intense as other types of paint. It may be as simple as giving the surface a quick cleaning and a light sanding.
Chalk paint can be used on just about any surface, so your kitchen cabinets of any material will be covered (literally!).
Chalk paint works with either a roller or a brush. In the kitchen, a brush will most likely be better to use, but you could use a roller for something larger, like a pantry door.
Although chalk paint is not as durable as some other paints and it can absorb stains, it is often used to produce an antique or ‘shabby’ look, which will be enhanced by the occasional stain, bump or scratch. If the farmhouse or shabby chic look is what you desire for your kitchen, then chalk paint is you best option.
If the cabinets are sealed with a liquid sealant, they will be very durable and protect the cabinets well, even better than a wax sealant.
Because it is thick, chalk paint can be used over a wood that has a significant grain and will hide the grain. It can also hide some stains and marks on the surfaces.
Cons
Leaving chalk paint bare on the kitchen cabinet surfaces can be a gamble because kitchens tend to be humid, especially near the stove, dishwasher, and sink. This may loosen some paint over time. This means that sealing your chalk paint is a must.
Additionally, chalk paint itself is quite susceptible to bumps, and scratches, so it is most likely best to seal it if you do use it for your kitchen cabinets. Sealing the chalk paint is a good option to protect the cabinets, however, even the sealants are not foolproof. Sealing with wax means some ongoing maintenance and possibly redoing the wax at times. It is also not heat-resistant, which is something to consider in a kitchen. This means you would want to find an alternative sealant to wax.
Chalk paint has to be applied carefully with a brush, because it is thick and the brushstrokes can often be seen. There are ways to avoid this and get a smooth finish with your chalk paint, so be sure to look into those techniques so you get the final results you are looking for.
The thick consistency of chalk paint means it can ‘pool’ in small areas, such as indents or patterns on a surface and effectively fill in and get rid of that type of design feature. So, be sure to check your painted work before it dries to ensure it looks even throughout.

How to Paint Kitchen Cabinets with Chalk Paint
It may be an obvious point to make, but you would be surprised how many times people try to skip this step. First, you will need to remove the doors from your kitchen cabinets to get the best result from the painting. It is, of course, possible to paint the cabinets as they stand in the kitchen, which is less labor-intensive, but you are unlikely to get into each corner and the painting is unlikely to be as detailed and efficient as you would like it to be, so removing the doors is best.
However you choose to paint the cabinets, you do need to remove any handles and any other hardware that can get in the way of painting the whole door.
Preparing the Surface
You will need to make sure your kitchen cabinets are clean and empty. Be sure to remove all items from the cabinets and store them in a safe place until your project is done (this may also be the perfect time to do a little decluttering, if you’ve been putting it off).
Once you have removed everything, you will have one or two steps left before beginning to paint, depending on the type of finish your kitchen cabinets have.
There are basically two finishes on most kitchen cabinets: laminate and plain wood. Preparing the surface of the kitchen cabinets that have a laminate finish before you paint with chalk paint is usually simply a matter of washing them properly with warm water and soap. If the cabinets are wooden and painted and the paint is peeling, even slightly, you will need to prepare the surface more carefully.
It may be sufficient to sand down the cabinets, to get rid of any loose paint and make sure they are even. If the paint is very old and needs to be removed, then you may need to strip the paint with a paint thinner and then sand the surfaces.
Clean the cabinets with mild soap and warm water to remove any dirt, dust, and stains that could be present, then allow them to air dry. This will allow the paint to adhere to the surface better and provide you with more even coverage. If the surface is dirty, or too uneven, or if there is old paint, then the paint will not adhere completely to the surface and will eventually peel away. I recommend doing this the evening before you plan to begin painting, so your cabinets can dry overnight.
Painting
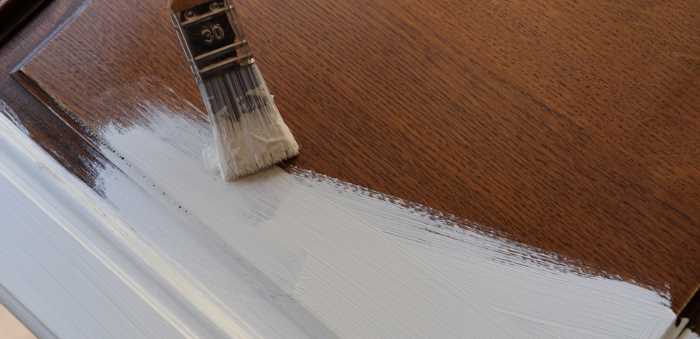
Unless you are going for a shabby chic or rustic look, you are likely to want your kitchen cabinets to have a smooth finish. This is achieved by applying the paint in smooth, even strokes. Use a fairly broad, flat paintbrush and make sure that the strokes you use are fairly long and even. For the sides of the doors and the corners, you will need to use a smaller paintbrush. When you tackle these smaller areas with small strokes. Don’t dab the paint, as it will produce an uneven look.

Applying the primer
The first stage of painting is the primer, which is basically clear paint. What it does is help the paint adhere to the surface.
Most of the time priming isn’t necessary when using chalk paint. In fact, that is one of the appeals of the paint. However, for a project like kitchen cabinets, it may behoove you to take this extra step to ensure longevity.
Using the flat brush and long, even strokes, paint the surface of the cabinet and let it dry. If the surface has not been covered sufficiently, you may need to use more than one layer of the primer.
Cleaning the Brush
After applying the primer, thoroughly clean the brush before using it for the paint. Check on the primer container: if it is water-based, then you can use warm water and soap to clean the brush; if it is oil-based, you will need to use mineral spirits or turpentine.
When the brush is clear of primer, rinse it off in warm water, to remove any soap or spirits/turpentine from it.
It is better to begin painting with a dry brush, so you can either wait overnight to begin painting, you can use an old cloth to dry off the brush, or use a completely separate brush.
Painting the Cabinets
Read more : How to Fix a Slow Draining Bathroom Sink That Isn’t Clogged
This may be self-explanatory, but here are a few tips, trick, and hacks to aid in this process.
One of my favorite hacks is to take a large rubber band and wrap it around the paint can so that is stretches across the mouth of the can. When you dip the brush into the paint, instead of wiping it on the side of the can and creating drips and runoff, wipe your brush against the rubber band to remove the excess paint.
When you do this, all your excess paint goes back into the can and you eliminate a runny mess down the sides of your paint canister. Wiping off the brush will also help remove any extra paint that could cause runs or blotches on your cabinet surface from over saturation.
When you begin painting, paint the cabinets with one layer of chalk paint, using long, broad even strokes. Use the smaller brush to paint the sides and corners. Let the first coat dry completely before applying a second coat. In most instances, chalk paint companies recommend waiting a full 24 hours between coats, which is why the process, while not difficult, is time consuming.
I most instances, two coats should be sufficient, but you can apply a third if you want a really solid look to the paint, or if the color you are using requires another coat for adequate coverage.
Chalk paint is water-based, so wash the brush in warm water and soap to clean it. Remember to rinse it with plain water to get rid of any soap.
Finishing off
When you have finished painting the kitchen cabinets, you can choose to leave it or finish it off by sealing it or distressing it. However, we do not recommend leaving them unsealed due to the high trafficked nature of the cabinets, along with the temperature fluctuations that come from normal kitchen appliance use.
Distressing chalk paint
Creating a distressed look is fairly simple to do with chalk paint. If you take sandpaper to the surface you have painted and sand areas so that the paint is actually stripped away a bit, you will end up with what is described as a ‘shabby chic’ or antique look. However, you can only do this with cabinets that are wooden and not laminated.
Sealing chalk paint
As stated before (we really want to drive this one home, don’t we), to give your kitchen cabinets the most durability, attractive finish, and fresh look that will protect them, we highly recommend you seal your cabinets once you finish painting them. This will prevent the paint from scratching or chipping over time and will prevent you from having to touch them up frequently.
Most expert painters will suggest you wait 3 days before sealing chalk paint. This will give your paint time to fully dry and partially cure.
For the best options on sealing your kitchen cabinets, check out our article here on sealant options.
Once you have sealed your cabinets, you can replace the doors and hardware. This is also an excellent time to update any knobs or handles that are outdated or don’t match the new look of your kitchen cabinets.
FAQ
Can I use chalk paint on my kitchen cabinets without sealing it?
The short answer is yes you can, but you really don’t want to. Chalk paint, on its own, can be chipped or scratched quite easily, which means that it is likely to become damaged in some way in a high-trafficked space like the kitchen. However, if you are aiming for a slightly worn, shabby look, this can be the best route for you to take.
Do I have to seal chalk paint with wax?
No. Chalk paint can absolutely be sealed with wax, but it may not always be the best option. You can also seal it with a liquid sealant, such as polyurethane or polyacrylic (my personal favorite).
Is chalk paint suitable for creating a worn look for my kitchen cabinets?
Chalk paint is quite a thick paint and is actually quite soft, which is why it can be scraped quite easily. However, this is exactly why it is suitable for distressing and creating a work, or ‘shabby chic’ look.

Conclusion
Chalk painting your kitchen cabinets isn’t as scary of an undertaking as you might think. It really creates an economical and simple opportunity for changing the look and feel of your kitchen without breaking the bank. If you keep aware of the few disadvantages and pitfalls of using chalk paint in the kitchen, and make preparations to combat those as best you can, you will find that it really is a great option for revitalizing your kitchen cabinets.
Have you already embarked on this undertaking? Share you experience with us in the comments below.
Source: https://gardencourte.com
Categories: Kitchens


