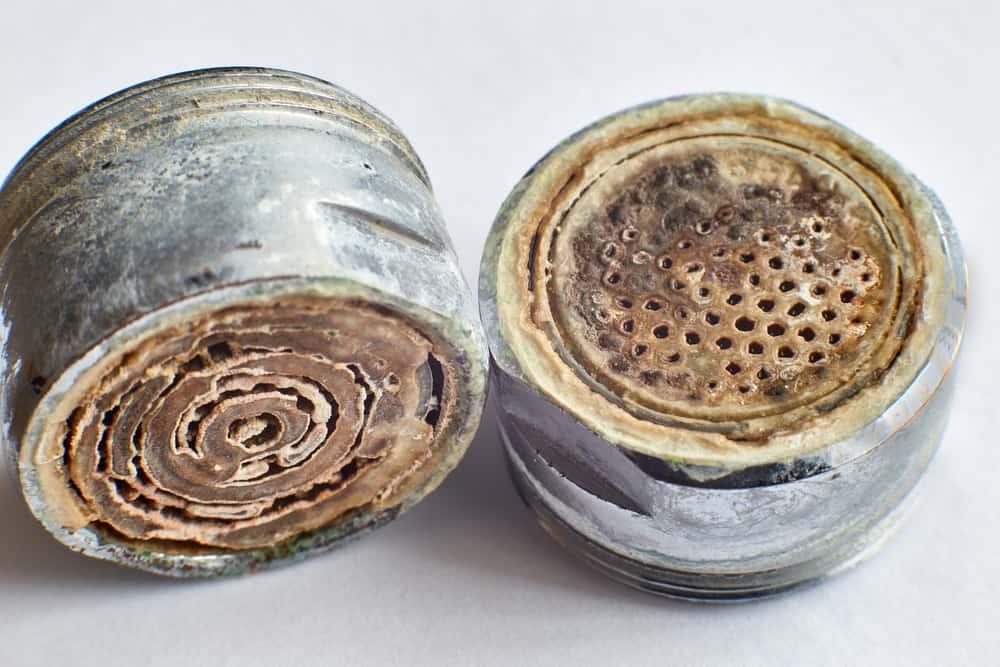
Over time, debris can build up in the aerator of your kitchen faucet, causing the water pressure in the kitchen faucet to seemingly decrease. The gunk restricts water flow, rendering your pull-down faucet almost useless due to the minute amount of water that sneaks through. Before you worry about faulty parts, check the warranty, contact Delta, try cleaning the aerator.
Luckily, cleaning the faucet aerator isn’t difficult and will only consume a few minutes of your time. If your Delta pull-down kitchen faucet aerator is in desperate need of assistance, here’s all you need to know to repair it and get the faucet up and running smoothly again.
You are watching: How to Clean a Delta Pull-Down Kitchen Faucet Aerator
What Causes Buildup In Faucet Aerators?
Nearly every kitchen faucet will accumulate dirt and mineral deposits that impede water flow over time. Although dirt is easier to understand, especially with kids running their grubby hands over every part of the faucet, calcium is a bit different.
Since tap water contains calcium used in water treatment, it can accumulate over time and begin to cause issues. The buildup can affect both inner and outer parts, particularly the aerator and valves. Once the accumulation gets to a certain point, it restricts water flow, causing leaks or poor flow rates.

The buildup may also occur in water supply lines, but before you get too carried away in disassembling your entire faucet, try cleaning the aerator to see if that fixes a low water pressure issue.
How To Clean A Kitchen Faucet Head
Read more : Is This The Best Color Temperature For Kitchens?
Cleaning a kitchen faucet head can be tricky, especially if you take it upon yourself to disassemble the internal parts of the faucet head. However, you can easily clean the spray head without having to get too technical.
Here’s what you’ll need:
- Distilled white vinegar
- Large bowl
Fill a bowl with enough vinegar to submerge the faucet head, then set it in the sink or on the nearby countertop. To clean the faucet head, submerge the entire spray head, aerator and all, in the distilled vinegar. Allow it to sit for several hours at least, but preferably overnight. After it has thoroughly sat, rinse the sprayer with clean water. Reattach it to the faucet, and then check for regular flow.
Cleaning The Aerator

The aerator in faucets does exactly what the name implies: it oxygenates water moving through. It helps save water by reducing the flow using a straightforward mechanism. The backside of the aerator has numerous tiny holes that increase water pressure as the water is forced through.
When mineral deposits or dirt accumulate on the aerator, the tiny holes become blocked, thus reducing water flow. Cleaning the aerator is not difficult and won’t take very long as it only involves a few steps.
Simply remove the aerator from the spout, then run it under water and remove built-up sediment with a sponge. If there are stubborn deposits, you may need to soak the aerator in vinegar for a few hours to loosen the gunk.
How Do I Remove The Aerator From A Delta Pull-Down Faucet?
Read more : The Best Shades of White For Kitchen Cabinets
In many Delta pull-down kitchen faucets, the aerator is cached and not as easily accessible as some. If you have the key, the process of removing the aerator is a breeze.
Look beneath the faucet spout: a series of notches will surround an inset aerator. If you can’t see underneath the tap, use a small mirror to locate the notches. You can also use a Delta faucet aerator assembly diagram. Delta created a special cylindrical tool that perfectly fits inside the designated notches in the spout. Using the plastic tool, you can unscrew the aerator.
Several third-party manufacturers make and sell similar keys. They are available for just a few dollars and are a good thing to have on hand.
How To Remove A Delta Faucet Aerator Without A Tool?

If you don’t have the special little plastic removal tool, no worries: you have a few other options. First, try twisting the aerator with your fingers. There’s a good chance that it was hand-tightened when it was installed, so you might be able to turn it with your hands. If you can’t get a good grip on it, use a rubber glove to try again.
Now, if you cannot turn the aerator, try using a butter knife or flathead screwdriver. Try wedging the tip of the blade or screwdriver into one of the notches and push. If mineral deposits are causing the aerator to adhere to the faucet body, try using a hammer to tap the end of the screwdriver lightly.
A pair of needle-nose pliers may also do the trick. Hook the jaw tips into the aerator notches and try to spin it counterclockwise.
Source: https://gardencourte.com
Categories: Kitchens


