After building easy DIY raised garden beds comes the fun part of personalizing them. Raised bed landscaping can help deter weeds and give your garden a personal touch.
Plus the prettier your garden is, the more likely you’ll want to spend time out there tending to your veggies.
You are watching: 5 Pretty Landscaping Ideas for Your Raised Beds
Around my raised beds, I added a river rock border and a paver stone path surrounded by ground cover and mulch. These are my favorite raised bed landscaping ideas to get you started.
Note: This article contains affiliate links. See my disclosures for details.
1. Lay a River Rock Border
Every river rock is different, which makes this a forgiving material when used as a border. You don’t have to be perfect. You can arrange the rocks however you’d like and your garden will look pretty.
Lay them out one by one, with each rock touching the next in the border. I went with a square shape around my garden beds.
2. Install a Paver Stone Pathway
Next choose your pathway material. I used square paver stepping stones. You might prefer flagstone since it’s more forgiving, but I didn’t consider that when I chose pavers.
Pavers require precision.
Start by laying them out approximately where you’d like them to go. Test out how far you want your pavers spaced out by walking across them and adjusting until the spacing feels right. Mine are 12 inches apart.
You’ll also need to consider how the stepping stones will fit within your space. Maybe you wanted them 14 inches apart, but they’ll fit better 11 inches apart, for instance.
Dig Your Paver Trench
Read more : First Timers Guide to Garden of The Gods in Colorado
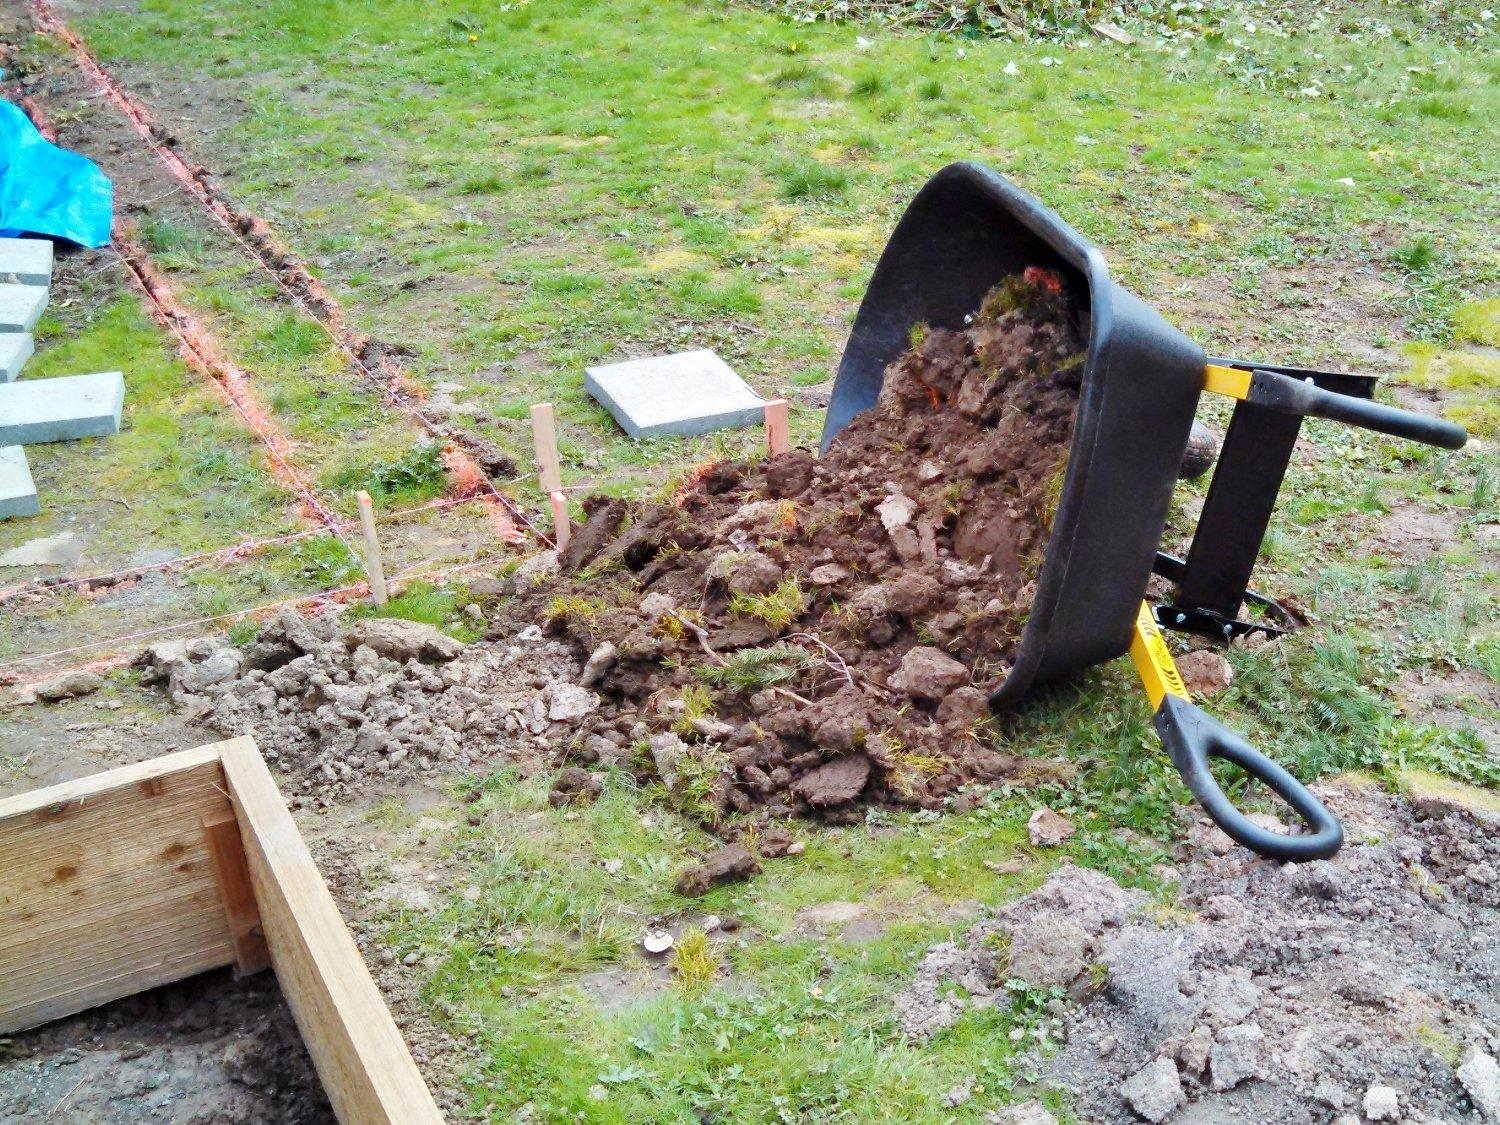
Next stake some string on each side of your future paver path as markers. Set the pavers to the side and start digging a trench along your defined path.
The first time I did this, I dug the trench deep enough for my pavers to be flush with the ground. My pavers spent most of the following winter under mud and rainwater, and I got to redo them the next spring. Oops. The second time around, I kept the trench at a depth that would put the pavers an inch above ground.

You’ll also be adding paver sand under the pavers and pea gravel or mulch around the pavers, so factor that into your depth. If your pavers are 2 inches tall, you can dig your trench 1.5 inches deep and add half an inch of paver sand.
Lay Your Pavers
After you dig your trench to your preferred depth, pour your paver sand into your trench, spread it out and start adding your pavers one by one. The paver sand makes it much easier to level the pavers, and it helps keep them from sinking or moving too much over time.

For each paver, you want to make sure it’s square with your path, square with the pavers on both sides and level with the nearby pavers. (This is why I should have used flagstone!)
You can keep lifting your pavers and adding or removing sand until they’re right. When all else fails, use a rubber mallet to pound the pavers into place.
Then you can add some of the dirt you removed back into your trench between the pavers.
3. Plant Ground Cover
Now we plant! Who says all of the plants need to be inside your raised beds? There are lots of pretty ground covers that can beautify the surrounding area.
I tried a few different kinds of ground covers. The ones that survived here in the Pacific Northwest were sedum tiles and Scotch moss.
You can tear each sedum tile into several smaller five-inch pieces and place them around your beds. The pieces will grow and spread. Just check that each piece you cut has a few different varieties of sedums for interest.
Read more : What Do I Put on the Bottom of a Raised Garden Bed? 4 Things
I planted the sedums around my path. They have been rained on, snowed on and exposed to 100-degree sun. They are completely neglected in my yard but they still thrive and grow. I heart them for it.

You could also try Scotch moss. The moss poofs up and spreads to make little squishy mounds…fun to walk on! I’ve lost a couple of Scotch moss plants because they need a little more water when getting established. In other words, neglecting them was about 80% effective, so I approve of their durability.
Scotch moss flowers in late spring, and don’t you love the chartreuse color?

Related: Spring-blooming flowers that are easy to care for
4. Surround Your Beds With Pea Gravel
It’s time to fill in the area around your beds. If you have weeds and grass, cut them back and cover them with cardboard before placing your pea gravel. Add a few inches of pea gravel inside the river rock border, all around the beds, pavers and ground cover.
The idea is to keep the weeds away from your raised beds. In time, you will still probably get a few weeds. When that happens, move the gravel to the side, lay a piece of cardboard over the weed, and then cover that with gravel and let the cardboard choke out the weed.

5. Add Pretty Mulch
Finally, fill in the area around the outside of your beds with a pretty mulch. This makes everything look polished.
I added black mulch around the rest of my paver path and Scotch moss.

Raised Bed Landscaping
You could also add climbing plants, garden accessories, an arbor or even a whimsical gnome because YOLO.
Find more ideas for your garden:
- How to build raised beds
- Where to order plants and seeds online
- The easiest foods to grow in your garden


Source: https://gardencourte.com
Categories: Garden news


